How to Attach Greenhouse Plastic Sheeting to a Hoop House

Getting Ready to Attach Your Plastic to Your Structure
Choose a day with low wind speeds if at all possible. It is best to unroll the greenhouse plastic in the early morning in order to avoid having the wind work against you during this process. This is one of the steps of building a greenhouse kit in which it is best to have extra hands available. Particularly if you will have to be dealing with wind issues, think through the process before you begin.
Plan where you will need people standing ahead of time to secure the corners. Have the tools you will need at hand:
Tools Needed to for Installing Greenhouse Plastic
- Ladders, it is best to have at least 2 available. For taller hoop house you will want to rent a scissor lift.
- Bolt cutters or a hacksaw for cutting spring wire to length
- Push brooms, for easing the plastic over the hoops
- Tennis balls, can be placed on pole ends to protect plastic when guiding it over the structure. They can also be tied into a corner of the plastic with rope to be used in pulling it over the length of your structure.
- Rope
- Box cutter or similar tool for trimming plastic
- Safety Gear, gloves, goggles, ect.
- Greenhouse repair tape (accidents happen)
We have heard it said many times that everything speeds up in the build when you begin attaching the plastic: because the wind may be blowing it around, because many people will be looking to you to tell them where to be, because you are almost finished with your build.
How Do You Figure Out What Size of Greenhouse Plastic You Need?
The size of your greenhouse film can be determined by measuring the length and width of the growing structure that you wish to cover. Account for the total length of the pipes you will use to complete the hoops and the endwalls. Roll-up sides will require an extra 4' of plastic. If you are measuring plastic for the double layer, you will only need enough plastic to cover from hip board to hip board as the second layer will only need to cover the top of the structure.
Check out: How to Determine the Size of Greenhouse Plastic You Need
Begin Installing the Plastic on Your Hoop House
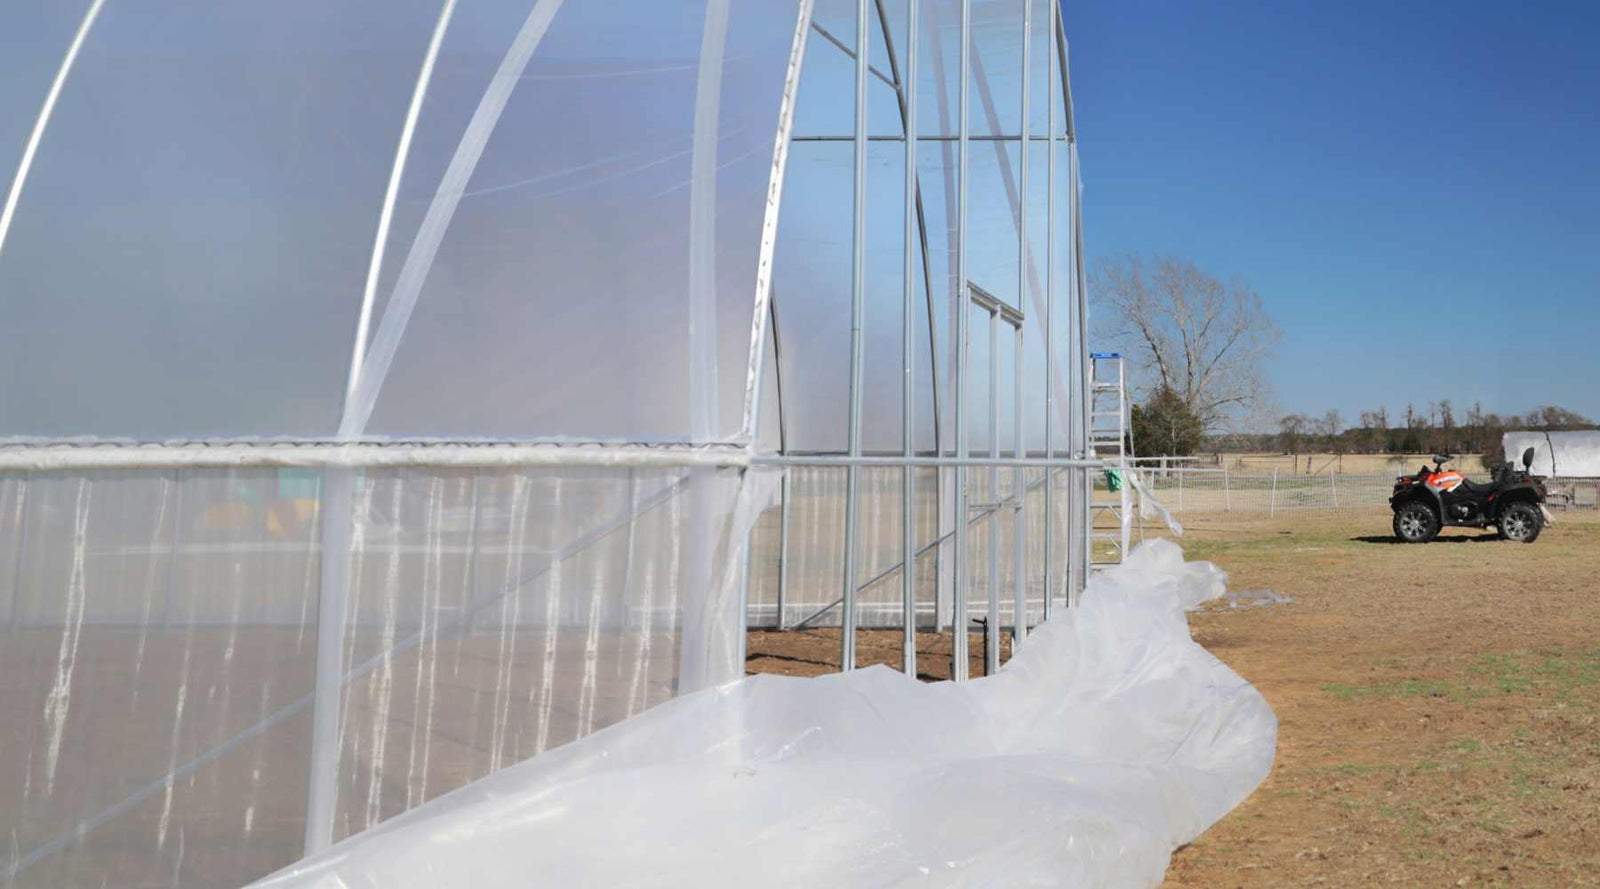
To attach greenhouse plastic, begin by unrolling your plastic film lengthwise along the structure. Unroll the film so that the label is visible from inside the structure you are covering when you attach the greenhouse plastic. Most plastic is folded in such a way as to facilitate it unfolding properly as you pull the corners.
After rolling out the plastic, have two people grab a corner of the film on the ends and begin lifting over the hoops of a hoop house greenhouse. As you begin lifting the plastic over the hoops work with the wind when unfolding otherwise the plastic will be pushed on the ribs making the job much more difficult. This is where having soft bristled brooms or poles with a tennis ball on the end is extremely useful.
Take care not to get hung up on corners, boards or hardware to avoid rips. In case of mishaps, it is a good idea to have a roll of greenhouse repair tape on hand to fix any small tears that occur. Having helpers near the endwalls to help unroll and unfold allowing the pullers more slack can make this process more seamless. When fully rolled out, the plastic film should have at least 2 extra feet all around the structure on the ground.
Securing Greenhouse Plastic with Spring Wire and Lock Channel
WHAT ARE LOCK CHANNEL AND SPRING WIRE?
Lock channel and spring wire is the industry standard for properly securing greenhouse plastic. Installing lock channel and spring wire is a simple and economical way of installing greenhouse plastic and other coverings, including poly plastic and shade cloth, to a structure. The PVC coated spring wire used to secure greenhouse coverings into a lock channel is sometimes referred to as wiggled wire because you will need to "wiggle" it up and down during installation. Spring wire, used in conjunction with the lock channel, forms a tight and secure attachment of your greenhouse covering.
In order to install the spring wire, pull the plastic tight and wiggle the wire back and forth into the channel. Each section of wire is 6.5 feet long so there will be places that you will need to cut the wire to fit. You can use bolt cutters or a metal saw to easily size the sections that you need.
We prefer the method of using spring wire and lock channel over the often used staples and batten board method because it gives the grower the ability to remove and reinstall the plastic without causing damage.
Installing Spring Wire and Lock Channel for Greenhouse Plastic
To finish securing the film to a greenhouse frame, begin at the top of an endwall and work down one side to the ground and repeat the process top to bottom on the other side. Move your ladder and your crew to the opposite endwall. With help, pull the plastic as tight as you can toward you and begin securing the film into the channel top to bottom and side to side.
Next, move to one of the long sides and begin securing the film into the lock channel with spring wire at the hip board. Once the plastic is secure along the length of one side wall, move to the opposite long side. While pulling down as tight as you can, secure the plastic with spring wire. After completion, you will be able to see where you can retighten the plastic by removing a section of spring wire and pulling from the bottom.
A note about insect netting:
If you plan to install insect netting to protect the roll-up sides on your hoop house; it will need to be placed in the lock channel with a separate set of spring wire before you install the plastic. Remember when you place your order to add enough extra spring wire to run the length of your hoop house times four. To read more on insect netting and how to install it check out the Insect Netting for Organic Pest Control for a Hoop House article on our blog.
How Do You Install Plastic With Rollup Sides?
To install roll up sides you will wrap at least 1’ of greenhouse film rolled and attached around ¾ EMT down the length of the greenhouse. Specially designed greenhouse snap clamps make this process relatively painless. Feel free to cut off any excess from the bottom past 12”. Once the greenhouse plastic is secured to the hand crank end, you may find that hand-rolling the non-crank end as you roll the sides up and down assists in alignment. Once you are satisfied with that, roll the side walls down to the baseboard to begin trimming for the end wall.
If you will be using roll up sides it is particularly important to plan for controlling weeds around the edges of the structure. Landscape fabric is one of the best ways to do this. You can read more about using Ground Covers on the Farm in this article.
Installing Plastic on the Endwalls of Your Greenhouse
For end wall plastic remember that you will be inserting spring wire into some lock channels as the first layer or as the second layer. The lock channel around the baseboards, door, door frame, optional vent frames, and all uprights will have the endwall plastic as the first layer inserted. For the end wall hoop you will be installing on top of the plastic any wire you already have in place.
The more places you can secure the plastic on the ends the better. This is because the endwalls are vertical and bear more wind load than the curved length of the hoop house or greenhouse roof.
Begin by securing the plastic across the baseboards including horizontal door and door frame pieces at the bottom.
You will then secure the plastic to the top with a second layer of wiggle wire in the end wall hoop lock channels that you first secured the plastic in when you began installing the plastic. When working the wrinkles out, think in terms of working from a central point and out diagonally.
Next work your way up the door, door frame, and uprights to the top of the hoop. It works best if you work from the bottom to the top from the middle out on one side and then the other. Securing these individual pieces after the perimeter makes the end wall skin very tight and that is exactly what you want. Lastly cut between the door and the door frame between lock channels to allow the doors to open.
What Kind of Plastic Do You Use for a Greenhouse?
The best greenhouse plastic for your gardening projects is UV stabilized plastic sheeting made of 6 mil or thicker polyethylene plastic. It is affordable, but is able to provide cover for many years. The greenhouse plastic that Bootstrap Farmer carries is under warranty for four years and will last well beyond that with good maintenance. It is easy to install without use of heavy equipment and is less expensive than glass panels or polycarbonate sheets. Greenhouse plastic film's ease of installation makes it a popular choice among small and large commercial farmers. Hobby growers as well as the home gardeners also use it to great benefit for plant protection and season extension.
What is the Difference Between Greenhouse Plastic and Regular Plastic?
Regular plastic sheeting that can be found in big box stores is inferior to greenhouse plastic. The intended use for sheeting from hardware stores is different from greenhouse film, therefore it lacks UV stabilizers that are required for plastic to hold up under intense sunlight. This means it will begin to shred quickly when left in the sun covering your property with so much plastic confetti.
One key difference you will notice is the difference in price. You will pay quite a bit more for greenhouse quality plastic upfront. While the cost of regular plastic is lower, the likelihood that it will make it into the next growing season is low making it a seasonal recurring cost v. a farm investment. Not to mention the clean up required if the deteriorating sheeting ends up all over your or your neighbor’s yard.
What Thickness of Greenhouse Plastic Should I Use?
When selecting a plastic greenhouse covering, you should choose a thickness of at least 6 mil. This is the benchmark standard set by the NCRS because it is meant to last 4 years or longer. There are other sizes available with more or less thickness, but 6 mil is the average thickness of a heavy-duty greenhouse film.
If you opt for a thinner plastic, you may find that you will be making a replacement purchase sooner than you would like to. Greenhouse films that are 4 mil or less are often only rated for one to two years. These ratings will go down dramatically if UV additives are not added into the plastic.
Can I Use Plastic That is Thicker for a Greenhouse?
Yes you can use an 8 mil plastic, 10 mil plastic or 11 mil plastic film for a greenhouse or hoop house. Heavy-duty thickness like this is often found in woven polypropylene that carries an opaque hue. This greenhouse plastic thickness is desirable for growers wanting extra protection against the elements and a longer warranty. Thicker greenhouse film is more resistant to tears and rips, providing a more stable environment for your plants. Woven plastic is also more puncture resistant and holds heat better than regular plastic film.
Should I Install a Double Layer with Inflation?
Installing a double layer of plastic to your greenhouse or hoop house can increase your structure’s ability to withstand heavier snow loads, cooler temperatures, and sustained winds. The extra insulation that this added layer and air mass give to your greenhouse structure can help take you further into the shoulder season with cool loving crops.
While there are advantages to the double layer, there are also disadvantages. If you are under contract with NRCS they may stipulate that the use of electricity is not allowed. You will not be able to use the air inflation kit without a power source. Another disadvantage is that using this energy costs money. If you are trying to go on a small margin, this would be an added expense that would bring down your profitability.
Using a double-layer and inflation kit isn’t always necessary either. It does not provide enough insulation to allow you to grow year round in cooler climates and would not provide enough impact in milder areas to warrant the cost. These are factors you will need to weigh out before making the investment in a double layer and inflation kit for your greenhouse or hoop house.
Check out this article on Double Layer Inflation Kits for more information.
Should I Use Clear or White Greenhouse plastic?
Growers use both clear and white greenhouse plastic depending on crop and preference. Clear plastics will provide more light transparency which is ideal for most vegetable crops. Opaque or white/woven greenhouse film provides more light diffusion and less light transparency. This added diffusion gives a more even coverage of light on the foliage and the reduced transparency is great for plants prone to sunburn. Whereas the clear plastic will heat up more quickly making it optimal for heat-loving crops.
Pros and Cons of Polyethylene Plastic for Greenhouses
Polyethylene plastic use for greenhouses is an inexpensive material used to cover greenhouse or hoop house structures. We love it because of its versatility and ease of use. It provides many of the same benefits as traditional greenhouse panels without the exorbitant cost involved with such materials. When cared for properly the replacement rate on greenhouse films is minimal due to its strength and advances in plastic technology that allow for greater UV protection. It is important to consider plastics with these type of protections such as UV additives and an added warranty to ensure that your farm’s needs are met and you are able to avoid extra trips to the landfill unlike with inferior plastic films.
Tips for Polyethylene Film Use
Using polyethylene film is a great way to provide your plants with protection and light diffusion. While often used with temporary structures, it can have quite a bit of longevity if properly cared for with these tips.
How to Make Your Greenhouse Plastic Last Longer
- Always make repairs as soon as you see any rips or tears as they will continue to grow
- Store in a cool and dry place when not in use.
- Do not let snow build up on your greenhouse film. Use a broom to remove any excess that could harm your plastic.
- Avoid pesticide use in your hoop house greenhouse as it can cause damage to your plastic film.
- Periodically check the tightness of your greenhouse plastic as loose areas can lead to rips, stretching and tears.
Should I Remove My Greenhouse Plastic During the Winter Months?
Removing your greenhouse film when not in use is optional. While it may extend the life of your plastic, the added labor is a consideration that needs to be factored into your decision. Storing greenhouse film will take up extra real estate that many farms simply do not have. Greenhouse plastic can be left on year-round even in high snow load areas with the right maintenance. For example, brushing off excess snow from your greenhouse structure to prevent added weight from causing damage. Also, making sure that your structure is safe from any trees or debris that could cause rips or tears during weather events. Read Ideal Greenhouse or DIY Hoop House Direction, Orientation and Location for tips on picking the right spot to build. These tips along with regularly checking for any rips and tears will help keep your plastic viable for longer.
Watch the Video Tutorial: