Seed Starting 101

Starting Seeds Indoors for Your Garden
Although growing a garden with store-bought transplants is fine, it does not offer you the cost savings, variety of choices, or control that starting your own seeds indoors does.
Many garden supply stores only offer a few types of tomatoes or peppers yearly, even though hundreds of varieties are available. Learning to start your own transplants from seed each year means that you can grow different types chosen for their beautiful colors, unique flavors, and suitability to your precise growing zone.
SOWING AND GERMINATING SEEDS FROM SEED PACKETS
Starting your own seeds from packets also gives you control over timing. Allowing you to be ready to plant your gorgeous starts outside as soon as the weather permits and not wait until they are available at your local nursery.
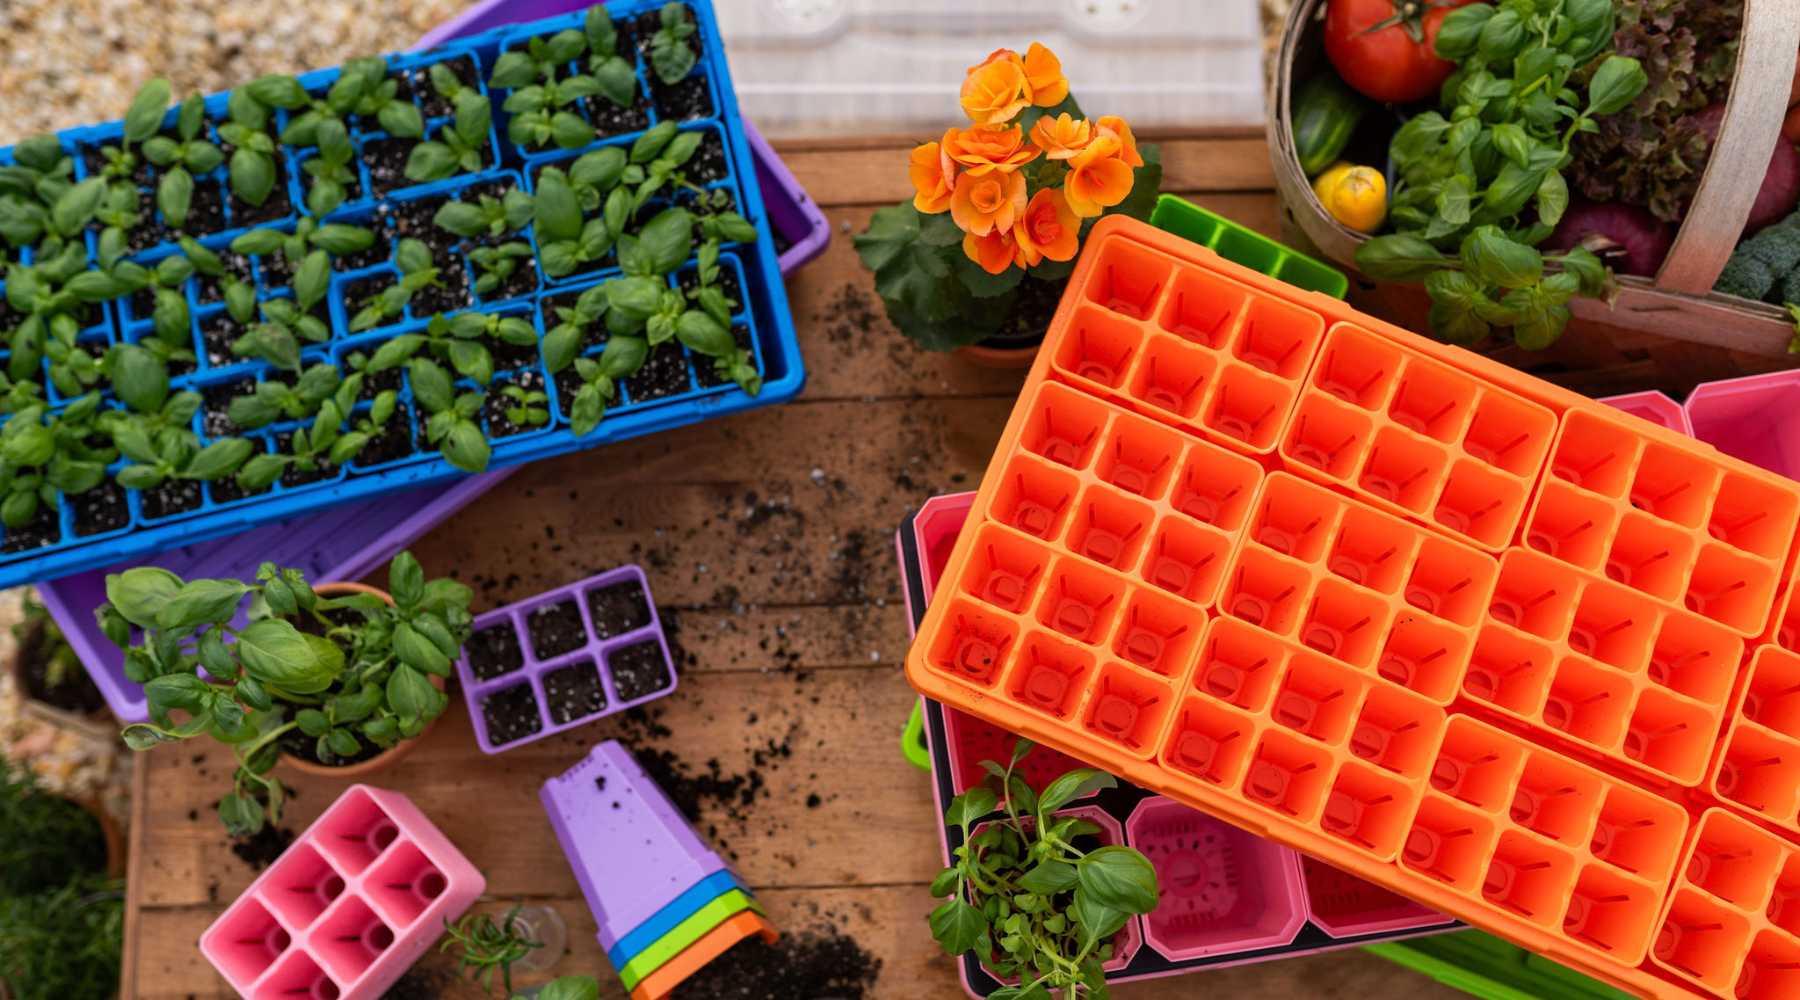
Most vegetables and flowers can be started indoors in cell trays or small pots for later transplant into your garden. We have compiled a list of everything you need before you gather your seed packets and start seeds indoors. These gardening tips will get you and your plants off to a great start.
TOP 10 SUPPLIES NEEDED FOR STARTING SEEDS INDOORS
- Seed-starting cell trays or seed-starting pots
- Sterile planting media (IE. seed starting soil mix)
- Table or Shelf (this can be a basic shelf or an automated grow rack)
- Lights (LEDs or T5 shop lights)
- Seeds
- Watering Can or Mister
- Labels or tape and a pen
- Rack fans or Oscillating Fan
- Heat Mat
- Larger pots for up potting
Check out the Ultimate Backyard Gardener Bundle to get everything you need in one package or for smaller plantings the 1010 Seed Starting Kit.
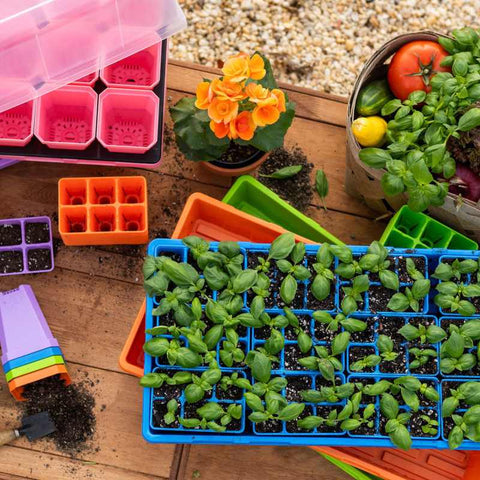
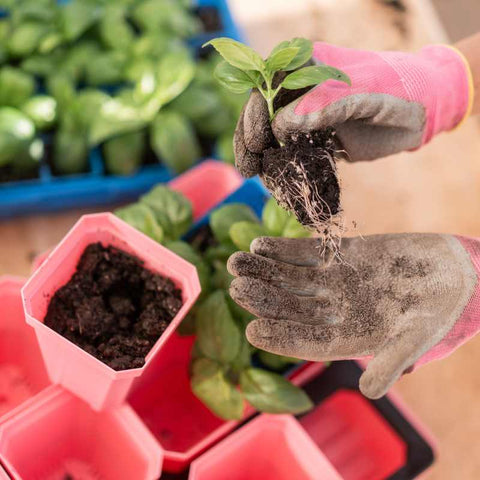
HOW TO PLANT INTO CELL TRAYS
FOR LARGE SEEDS LIKE PEAS, BEANS AND SQUASH.
Fill your cell trays halfway with potting soil. Take another cell tray and stack it on top of the cell tray you are planting into. This will pack down the dirt and create divots to sow seeds into. Plant 2-3 seeds per cell and fill the tray with potting soil.
FOR SMALL SEEDS LIKE LETTUCE, BRASSICAS AND TOMATOES.
Fill your cell trays with potting soil to the top. Take another cell tray and stack it on top of the cell tray you are planting into. This will pack down the dirt and create little divots to sow seeds into. Plant 2-3 seeds per cell and cover with soil around one to two times the depth of the longest side of the seed. This means that for a seed that is ¼ of an inch long, you will cover it with ¼ to ½ inches of soil.
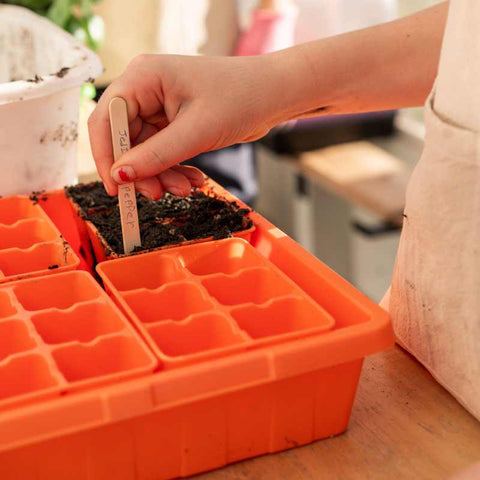
FOR ALL PLANTED SEEDS.
Water your newly planted seeds liberally but gently. We recommend using a spray bottle or mister. Cover your tray with a humidity dome and place it on your shelf or a heat mat if using one. The humidity dome will maintain the perfect conditions for your seeds to germinate. Be sure to label your seedlings!

GERMINATING SEEDS WITH A HUMIDITY DOME
Once you have planted your seeds into your cell trays, it is wise to cover them with a humidity dome to maintain the best conditions for your seeds during germination. Humidity domes increase germination success when used correctly.
Keep the humidity dome on the newly seeded tray until the first sign of germination. After that, remove the dome and set the tray under the lights. It is essential to remove the humidity dome at the first sign of germination, as mold can occur. Once under the lights, seedlings will need airflow and water.
HOW DO YOU KEEP SEEDLINGS WARM?
Seedlings should be grown in a closed environment that is at least 60℉. The soil temperature needs to be in the range between 65℉ and 80℉, depending on the variety. Frost-tolerant plants like broccoli will do fine in the low end of this range, while tomatoes and peppers will germinate and grow much better above 75℉
Both grow lights and heat mats help maintain temperatures in this optimal range. Use a heat mat with a thermostat and temperature controller for best results. Check out this article for information on how to use a heat mat for seed starting.
HOW LONG DOES IT TAKE FOR SEEDS TO SPROUT INDOORS?
Typically, vegetable seeds sprout in 3-4 days under the right conditions. Some fruits, flowers, and herbs can take 14 days or longer to germinate. Consider pre-soaking your seeds for faster germination to speed up the process. Germination rates can slow substantially if you germinate seeds in cooler soil temperatures. For best results, use supplemental heating like a heat mat, and keep the humidity levels consistent by using a humidity dome for the highest germination rates.
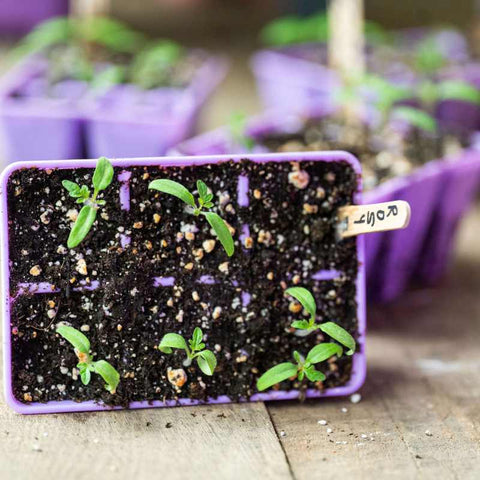
WHAT DO I DO AFTER MY SEEDS GERMINATE?
After your seeds sprout, remove your humidity dome and place directly under grow lights. Keep the soil moist but not saturated until you are ready to harden off your seedlings. Bottom watering is the best method to keep seedlings healthy.
DO YOU NEED A GROW LIGHT TO START SEEDS INDOORS?
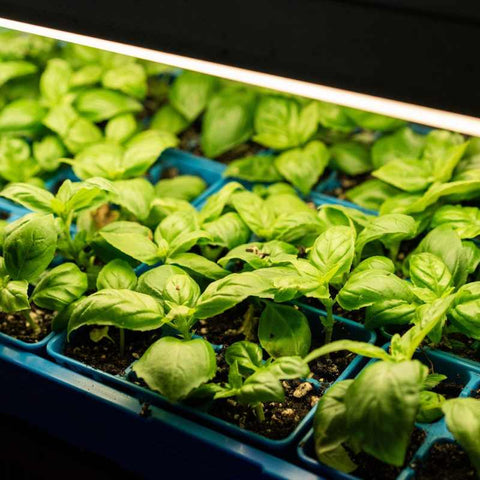
Setting up an ideal seedling growing area does not need to be expensive. Direct lighting for your growing seedlings is recommended for 14-16 hours daily. This can be done with a simple led light hung around 6 inches above the seed tray. A baker's rack works very well for this.
The three most important things a seedling needs are proper airflow, adequate light, and a consistent temperature range between 65℉ and 80℉. You can obtain all of these conditions with the appropriate equipment regardless of where you are growing.
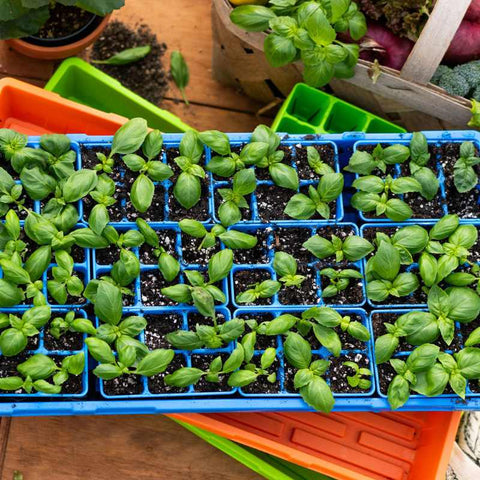
WHEN TO TRANSPLANT SEEDLINGS FROM A CELL TRAY?
Typically, your seeds will stay in their seed tray for 4-6 weeks. After this period, you will either need to transplant the new seedlings into larger pots or transplant them outside. Check your seed instructions and pay attention to your frost dates before transplanting young plants outside.
A developed root system needs to be in place before successful transplanting of young plants can happen. Another thing to look for is the development of the "true" leaves. Check out When to Transplant Seedlings for more information on when to move your seedlings out of the cell trays.
WHAT HAPPENS IF YOU TRANSPLANT SEEDLINGS TOO EARLY?
Transplanting seedlings too early can mean you are putting weak seedlings at risk of getting hit with a late-season frost. Always consider your growing zone, and if in doubt, hold back your seedlings a bit longer.
HARDENING OFF SEEDLINGS
WHAT DOES HARDENING OFF YOUR SEEDLINGS MEAN?
Before transplanting your seedlings, exposing them to the conditions they will have to survive outdoors is essential. This is called hardening off. Hardening off your transplants will help to prevent transplant shock. Expose your baby plants to outside conditions for about a week before planting. For more information on planting young seedlings, check out Transplanting Essentials.
5 EASY STEPS TO HARDEN OFF YOUR SEEDLINGS BEFORE TRANSPLANTING.
Proper hardening off takes from 7-10 days. These easy steps will help you get it right.
- Place your tray of seedlings outside in an area protected from intense wind and direct sunlight for 2 to 3 hours a day for three days. Remember to bring them back inside at night.
- For the next 3 to 4 days, place the seedlings outside in the mornings and bring them back in at night. Heat-loving crops can be in direct sun for this step, but cooler-season crops should still have at least midday shade.
- For 1 to 2 days before planting, leave your trays in their protected space outside overnight.
- Stop watering your seedlings 18-24 hours before you plan to plant them. (This makes it easier to remove them from the trays.)
- Plant out your seedlings and water well. If a late frost is predicted, you can always cover your new plants with a frost blanket to protect them while they get established.
TRANSPLANTING SEEDLINGS OUTDOORS
After hardening off your seedlings, it is time to plant. Take care to water your seedlings after planting them. Some use plug poppers or widger dibbers to remove plugs from cell trays. You will find what works best for you. Start growing directly into your garden space, paying particular attention to air pockets in the soil. If you are using landscape fabric, you will want to install that beforehand.
Plant the plug into the soil until the plug shape is not visible, leaving no gaps. Water in the transplant and continue to water often as the roots establish themselves. Always plant during cooler times of the day. It is best to plant in the early morning or evening to prevent sun damage to the root systems. Another option is to wait for a cloudy day to plant, giving you and your new baby plants a little respite from direct sun.
After transplanting, covering the rows while your seedlings are at their most vulnerable stage is a good idea. Check out the Ultimate Guide to Ground Covers on the Farm for more information on how to protect your growing space.
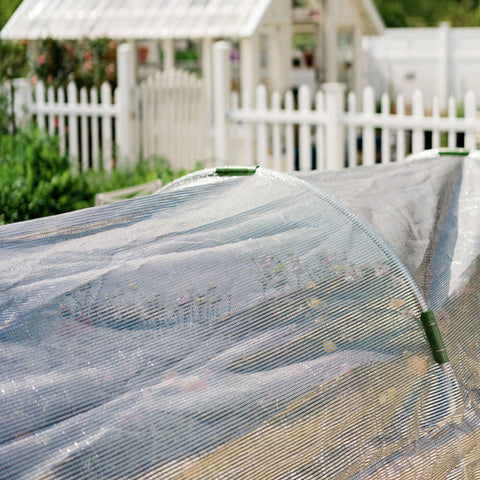
PROTECTING SEEDLINGS
Those newly planted seedlings must be protected from wind, insects, and birds. Insect netting is an excellent tool for this. Not only does insect netting create a barrier around the plants, but it also cuts down on diseases caused by insect infestations. Frost blanket can also be used to protect seedlings and plants if late frosts are predicted in your area or just to give them and extra bit of heat overnight.
Shade cloth or netting is another option to consider when looking for protection for your new transplants. Shade cloth not only protects your plants from sunburn but also helps them to utilize UV rays better. The shade cloth's reflective coating helps diffuse the light into a more usable form for plants, improving their growth and health overall. Shade cloth also helps to lower ambient temperatures inside the tunnel, helping lower the stress for the plants.
Beneficial insects are also an excellent way to protect your seedlings. Using beneficial bugs helps keep pest numbers at a manageable level without risking the lives of pollinators by using chemicals. Read The Importance of Beneficial Insects to learn more about beneficial insects and how to use them.
HOW DO YOU CREATE A GARDENING PLAN?
Before starting your seed packets, let's talk about creating an overall plan for your garden. Creating a gardening plan can save you a ton of time in the long run. Plotting the area on paper can help you plan in the most straightforward way to manage and harvest.
Make sure that you locate spacing requirements for the plants you are growing.
Along with spacing, it is also an excellent time to consider planting your taller crops in the northern area of your plot and planting smaller plants closer to the southern region of your gardening plot. This will help to prevent shading that could be detrimental to your crops.
For tiny seeds you have saved yourself or any for which the packet does not provide plant spacing, it is a good general rule that smaller vegetables be placed 4-6 inches apart while larger crops like broccoli or Brussels sprouts need 12-18 inches to spread their leaves.
Planning Garden Infrastructure
Once your garden is plotted out on paper, decide whether you want to use raised beds or garden rows instead. Raised beds take a bit of work but improve drainage and accessibility to the plants. Another option, if you are not interested in building a raised bed, is to grow in large grow bags. This is also an excellent option for a rooftop garden or in areas with inadequate or poor soil.
When planning the row spacing, account for a three-foot pathway. This leaves enough room next to each of the rows for weeding and harvesting. Planting the rows too densely can prevent weed management, leading to smaller yields.
When growing vining vegetables like melons, cucumbers, indeterminate tomatoes, or squash, the spacing should be increased to plan for sprawl or spacing for a trellis structure. Read Building Trellis for Indeterminate Tomatoes for more information on the process and when to use roller hooks for tomatoes. You can also use melon cradles to support heavier fruits if you are trellising.
HOW DO YOU CHOOSE SEEDS FOR PLANTING?
Choosing which seeds to grow can seem overwhelming for the first-time grower. It is imperative to consider a few things when picking out seed varieties. What vegetables do well in your area, and what do you and your family want to eat?
Locate your growing zone and use that as your guide when browsing seed companies to pick the best fit. Next, consider what will sell in your area or what vegetables you and your family enjoy.
The last thing to consider is your skill level. If this is your first garden, focus on easier-to-grow crops to start. We recommend squash, lettuce, tomatoes, collard greens, bush beans, peppers, and melons. Pick varieties that are labeled as disease-resistant when possible. Once you've picked your crops, get them on paper and start a garden plan.

WHAT IF I HAVE LEFTOVER SEEDS FROM LAST YEAR?
Most seed packets will have a date somewhere on the label, such as “Packed for 2024.” If your seeds are only a year old, go ahead and try planting them. Most seeds are good for one to two years. After that, the germination rate will decline sharply. If you have older seeds you wish to use, it is a good idea to do a germination test before planting.
HOW TO DO A GERMINATION TEST FOR SEEDS
- Place 5-10 seeds on a moist paper towel
- Keep the paper moist by placing it in a zip-top bag.
- Check the seeds daily, starting at three days and continuing for up to 14 days.
- Count the number of seeds that sprout and multiply by 20 for five seeds or by 10 for ten seeds. IE. 7 out of 10 seeds germinated you have a germination rate of 70%.
- Plant as you usually would, accounting for the germination rate. IE. if your germination rate is 70% you should plant at least five seeds if you want three plants to transplant.
WHEN SHOULD I START PLANTING SEEDS?
After mapping out your garden, determine when the last frost date is in your area and subtract 6-8 weeks from that date. Knowing this date, you can nail down the best timeframe to plant. Planning this will ensure that the seedlings have enough time to develop before the transplant date.
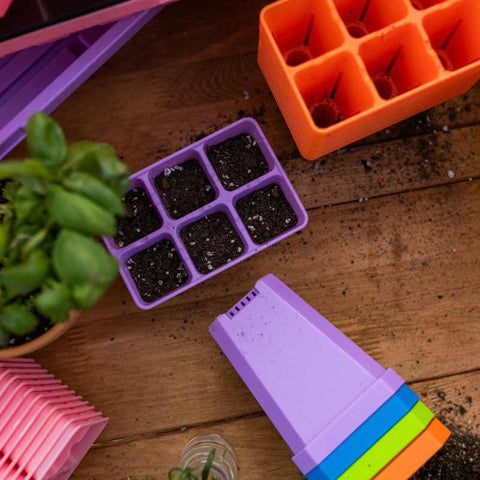
Now that you have your timeframe for planting, it is good to look into different ways to start seeds indoors. Seeds can be propagated in cell trays, soil block trays, or even just in small containers. Many find the cell trays a very advantageous way to grow more starts in a smaller area.
Finding the right size is essential if you want to plant into cell trays. Cell tray sizes vary to work with different crops and growth rates. Faster-growing crops need larger celled trays that can hold more potting soil to keep growing seedlings longer. While slower growing plants like herbs can be started in smaller cells. For help choosing the right sized cell tray for planting, check out this guide on Selecting the Right Cell Tray.
WHAT HELPS SEEDS GROW?
In the beginning stage of the growth of your seeds, you will need to ensure that the seed stays moist and is in the correct temperature range. A heat mat with a thermostat used with a humidity dome helps ensure the sown seeds remain in the optimal temperature and humidity range. Once the seeds germinate, thin out the competing sprouts so there is only one or two in each cell plug or pot. A basic fertilizer such as worm compost tea or a seaweed/fish fertilizer at the 2-3 week point will boost your seedlings. Take care to provide your seedlings with ample light (around 14 hrs/day) that is pretty close.
WHAT HAPPENS IF YOU PLANT SEEDS TOO EARLY?
Seeds planted too early may require the grower to pot up or transplant into a larger pot or grow bag until it is safe to bring them outdoors. For some in growing zones with a shorter season, this is a regular practice for plants such as peppers, tomatoes, and many flowers to spend a few weeks in a larger container before going outdoors.
WHAT IS THE BEST SOIL MIX FOR STARTING SEEDS?
Choose a good potting quality potting soil with these key features:
- Good drainage
- PH between 5-6.5
- Moisture retention
- Allows for airflow
- Light to no fertilizer
Some key ingredients to look for in seed-starting soil are perlite, vermiculite, peat moss, coconut coir, compost, and a basic fertilizer or ground limestone. Learn more about growing mediums in this helpful article.
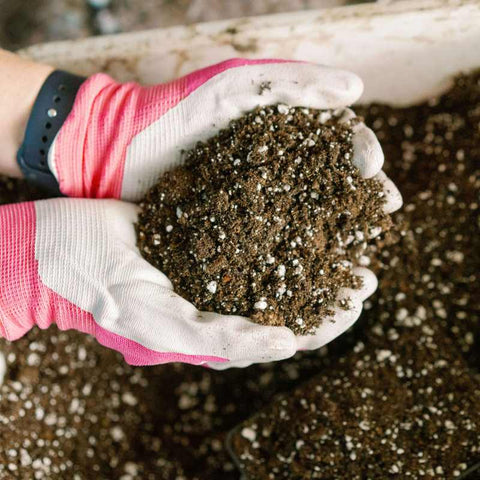
HOW MOIST SHOULD SOIL BE FOR SEEDLINGS?
The seed starting mix that you use should be slightly wet but not dripping, like a wrung-out sponge. It should hold well together when pressed firmly into your cell tray or pot but not so saturated that it will not hold any air for the seeds to germinate. Overwatering will cause an anaerobic environment that will lead to die-off and rot.
GROWING YOUR OWN TRANSPLANTS FOR GARDENING SUCCESS
Starting your own garden from seed is intensely rewarding. Not only will you have plants ready to go into the garden when you are ready, but you won’t rely on your local garden center or nursery to grow your food.
The wide variety of interesting flavors, colors and textures of vegetables and fruits available to you when starting your own is astounding. Your hottest of hot ghost peppers or habaneros will amaze your tastebuds. Having red, purple, green, orange, and even black tomatoes will liven up any plate. You will be able to find early lettuces and late pumpkins to extend your growing season.
Starting your own seeds from scratch also means you can save the best of your garden every year to grow again. In this way you will create your own seed stock specially adapted for your microclimate.
*HERE ARE SOME GROWING ZONE GUIDES:
Last Spring Freeze Map from the National Oceanic and Atmospheric Administration
First and Last Frost Dates by Zip Code

FAQ ABOUT STARTING SEEDS
WHY START SEEDS INDOORS INSTEAD OF BUYING TRANSPLANTS?
Starting seeds indoors from a seed packet is much less expensive than buying plants at the nursery. It is also a way to give you control over what nutrients and pesticides are used in the rearing of your plant.
DO I NEED TO SOAK MY SEEDS BEFORE I PLANT THEM?
Larger seeds often do benefit from soaking before planting. We recommend following these simple steps when soaking seeds of any kind.
- Pre-rinse your seeds before leaving them to soak—the more debris and bacteria you remove from the seeds before soaking the better. We recommend using filtered water for this process.
- After thoroughly soaking the seeds for a few hours, drain the water and do a short soak in diluted H2O2. A concentration of around 2%-3% for 5 minutes should do the trick.
- Rinse your sterilized seeds thoroughly.
Plant the seeds as you normally would at a depth one to two times the size of the seed. Learn more about disinfecting seeds in this helpful article.
H202 Diluted Solution Recipe (35% diluted to 3%)
- 1 part 35% Food Grade H202
- 11 parts H20
SHOULD I COVER THE SEEDS WITH PLASTIC WRAP?
It is possible to protect your germinating seeds by covering them with plastic wrap. While this will help keep some soil heat in, it will not protect your seedlings from pests very effectively and can only be used once before discarding. Instead, we recommend investing in a reusable humidity dome.
HOW DO I STRATIFY SEEDS?
Stratification of seeds is any process designed to mimic the natural conditions needed to break the seed’s dormancy. Cold stratification, soaking of seeds and scarification are three main methods of stratifying seeds that are used for planting at home. The fourth method of heat stratification is only used for seeds that need to be exposed to high temperatures before germination to simulate a wildfire.
HOW CAN I USE COLD STRATIFICATION WHEN STARTING SEEDS?
Many perennials and flowers require a cold stratification process before germinating. We recommend doing this in moistened, fine-grade sand in an airtight container, stored in the fridge for 1-4 months. You will want to check them weekly, and lightly spritz the sand and seal in the moisture. Roses are a common flower seed that requires this type of stratification process.
HOW TO SCARIFY SEEDS
One of the most common seeds that benefit from scarification is butterfly peas. The process is straightforward: use a knife to nick the seed or rub it on fine-grade sandpaper. This helps to break the seed's outer coating to allow water to penetrate more easily. The process mimics what would naturally occur when an animal sends the seeds through their digestive system. This scarification ensures that you will get better results, as some of the seeds that require this have coatings that are hard for water to penetrate without the process.
HOW OFTEN SHOULD YOU WATER SEEDLINGS?
Check the moisture levels on your seedlings daily. We believe the best method of watering seedlings is to bottom water them using 1020 trays. This method allows for the soil to wick the moisture from the bottom. Bottom-watering is not only time-saving, but it prevents any damage to newly emerged seedlings. If you prefer to topwater, find a fine mist spray bottle to keep from damaging leaves. Check out the Easiest Way to Water Your Seedlings for suggestions on watering newly germinated seeds.
HOW LONG DOES IT TAKE TO HARDEN OFF SEEDLINGS?
Allow at least a week to harden off seedlings. You will do this gradually to avoid shocking the seedlings. Start by setting your seedlings outdoors during the daytime only for a few days. Slowly build up to leaving them outdoors full-time. Avoid leaving young plants in direct sunlight in their containers unless you can keep an eye on them all day to avoid having them dry out in a heatwave.
Place them in an area with plenty of shade to prevent “frying” your delicate plant starts if you are gone for extended periods or during the hottest part of the day. You will also want to keep them protected from the wind.
WHAT TIME OF DAY SHOULD I TRANSPLANT SEEDLINGS OUTDOORS?
It is best to transplant young seedlings early in the morning. You want to avoid direct sun hitting the fragile root systems of these new seedlings, so avoid afternoon transplants.
What is companion planting in the garden?
Companion planting in the garden is the practice of planting certain plants together to improve their success. Finding plants that grow well together this way is called companion planting. Planting herbs next to strawberries or garlic near your fruit trees can yield benefits for both plants.
An excellent example of this is corn, beans, and squash. Planting these three vegetables together, "The Three Sisters" is a perfect example of companion planting and a traditional method used by many Native American tribes. Squash fills in the ground cover area, shades the soil and helps stabilize the corn plant. The corn acts as a pole for the beans to climb, while the beans fix nitrogen into the soil to help the squash and corn thrive.
Featured Products
Also in How to Grow Seedlings

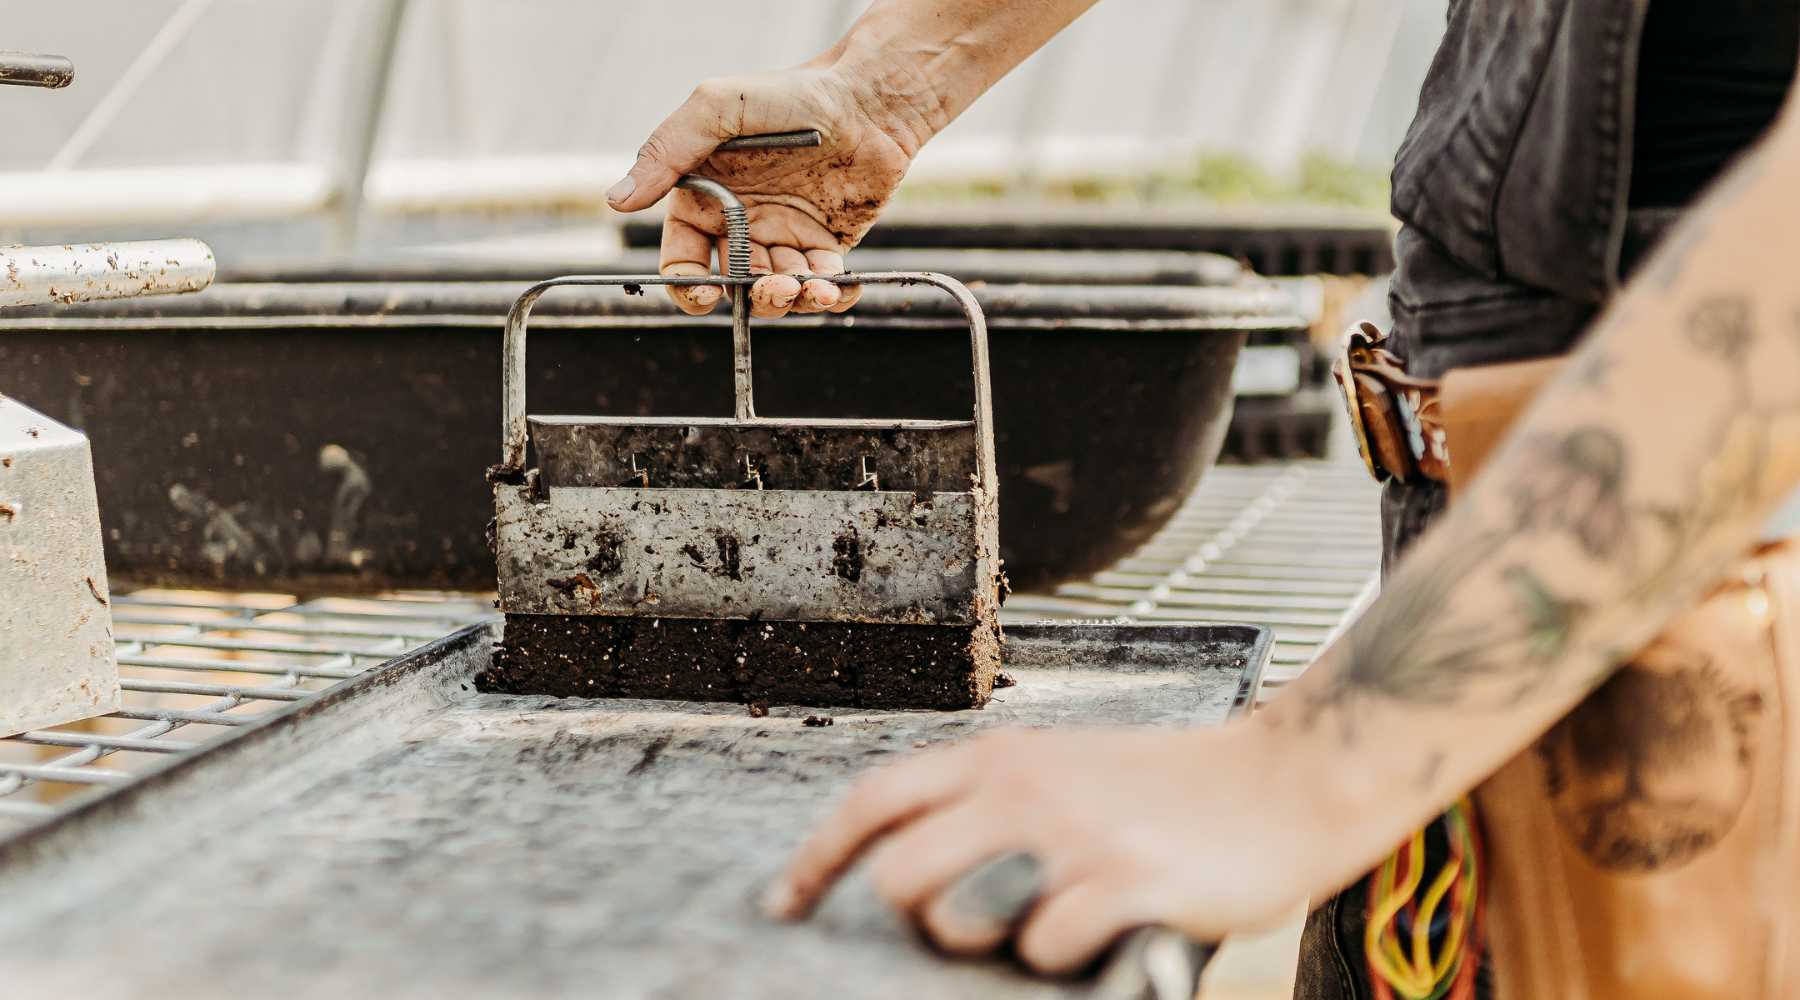
Soil Blocking 101
Soil blocking is a method of propagating seedlings that involves filling a metal blocking tool with soil and squeezing to form a compressed cube. Seeds are planted directly into the formed block. Soil blocks come in various sizes and are advantageous for air pruning roots.


How to Use a Humidity Dome for Seed Starting
Starting up seeds for this year's garden? Here is the lowdown on the humidity dome debate when starting seeds in cell trays or starting a tray of microgreens. Humidity domes are a useful tool to use during germination, often used in conjunction with heat mats.
Read More
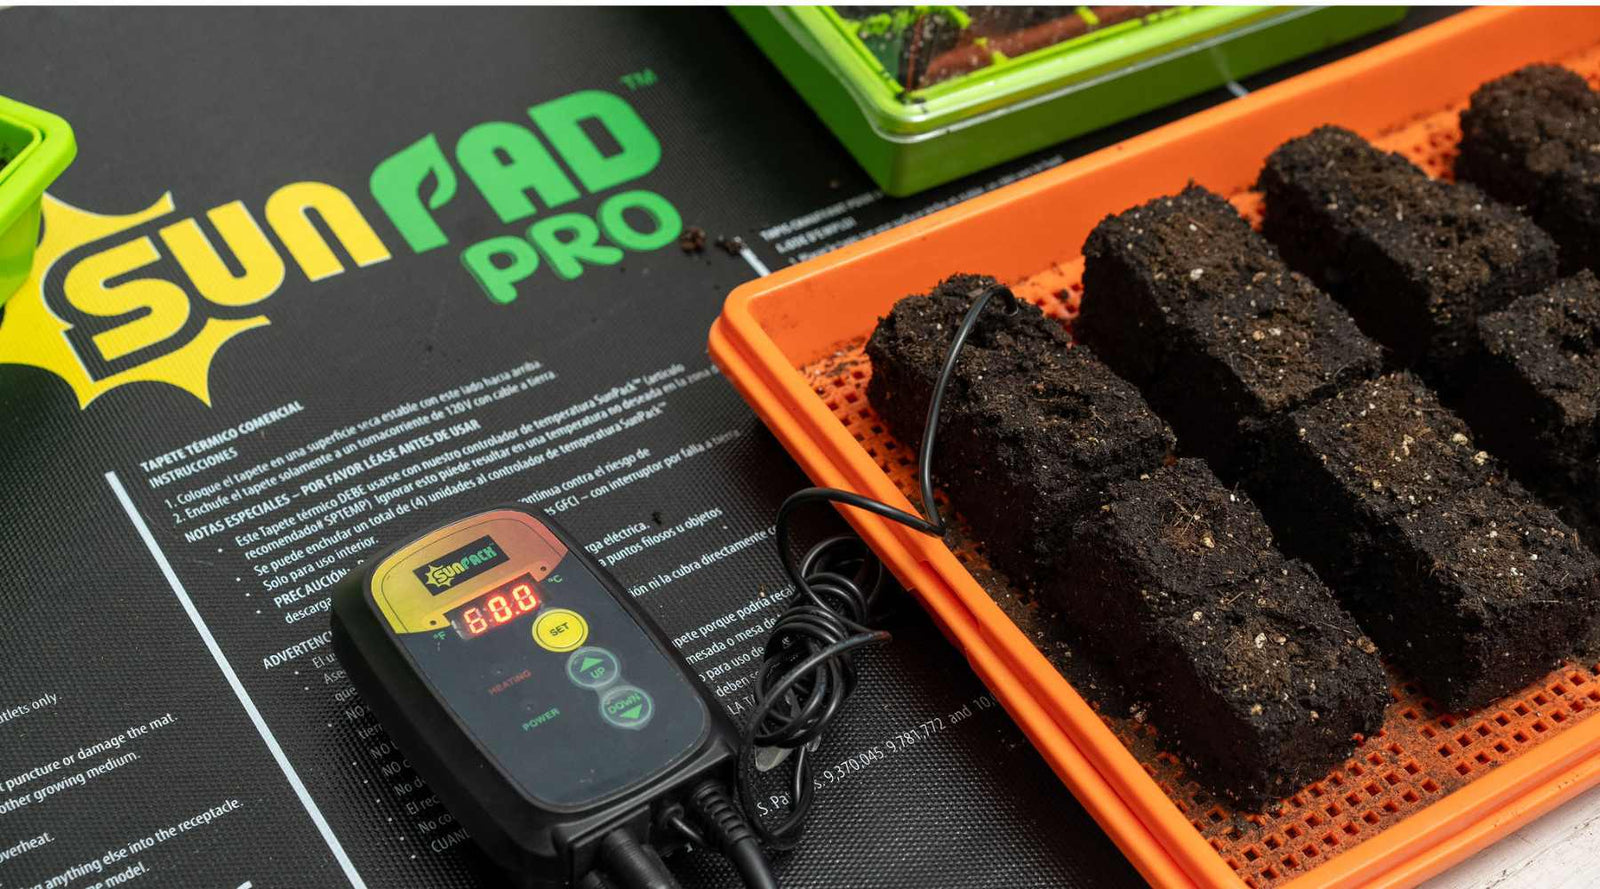

How to Use Heat Mats for Starting Seeds
Learn how to set-up and properly use a heat-mat in this quick how-to article. Read about the best way to use a heat mat and find out if you even need one!
Read More