10 Things I Have Learned As A New Gardener
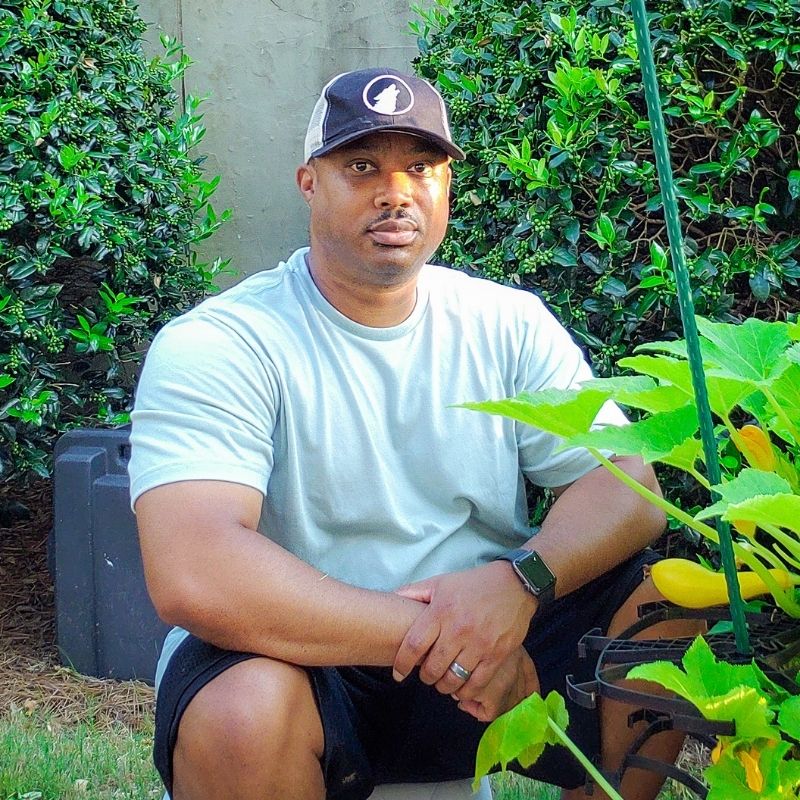

Hi, I’m Milan from ATL Grow. I’m an urban gardener based in Atlanta, GA, zone 8A.
At the time of writing this, I'm going into my third year of gardening.
Inspired by the food shortages during the early days of COVID and the memories of my Grandmother’s front yard garden, I started growing on a concrete patio in containers and fabric grow bags.
After an unexpected move last year, I’m now growing in raised beds, containers, and bigger fabric grow bags.
I am not an expert. I am a passionate gardener who loves researching and trying gardening techniques tailored for urban gardeners.
Today, I’d like to share my fun take on 10 things that I have learned as a new gardener. If you do a quick scan, you’ll notice some conflicting things on the list, but stick around, and it will start to make sense. Well, it does in this strange brain of mine.
1. Location is everything.
This is a popular saying in the real estate world. It might be even more popular in the world of gardening. The location of your garden determines not only what you can grow, but also when you can grow it.
I got very lucky with my first garden.
I live in the Southeast, where conditions are nearly ideal for gardening year-round. Like most people, I was already familiar with spring and summer (warm-season) gardens. The memories of my Grandmother’s front yard garden inspired me to grow herbs, tomatoes, peppers, squash, cucumbers, and zucchini.
What I didn’t know was how much we can grow in fall and winter (cool-season) gardens. Brassicas and many leafy greens can not only be grown from fall to early spring, but they also thrive in the cooler weather. Some crops are even enhanced by the little frost that we usually get in winter.
When planning out your garden, spend some time reviewing the weather patterns for your area. In the US, our areas are divided into hardiness zones. These zones provide us with a standard of what plants can thrive in our area. If you don’t know your hardiness zone, you can find it here on the USDA Plant Hardiness Zone Map.
2. Sunlight is the key.
I also got lucky with the orientation of my patio. It was south-facing. This meant that I got full sun (8+ hours a day) during the warm season. Most of the fruiting plants that I grow require full sun.
For the herbs and vegetables that didn’t quite need full sun, I was able to tuck them against the house, where they were shaded by the overhang of the roof after about midday.
When we moved into our current home, we went in knowing that I wanted space to garden. A large, clear lot was high on my priority list. I even used the compass app on my phone to check the orientation of the home and yard.
My backyard is south-facing, so I picked the area just off my back deck for direct access. I thought I had picked the perfect location, but I now realize I have a slight issue.
There’s a tree line at the edge of our property. During the winter, the area that I picked for my raised beds gets full sun from morning to early evening. What I didn’t account for was how much more shade would be cast once the trees were covered in leaves. In the spring/summer, that same area gets maybe 2-3 hours less sunlight. I still get enough light for what I’m growing, but I may have picked another spot in the yard, knowing what I know now.
Take note of how you can use not only your main climate but also areas around your home to create microclimates for your garden to grow best. In the future, I plan to expand my front/side yards, which have southern exposure and are not shaded by trees.

3. Timing is also everything.
Timing impacts so many aspects of your garden. I learned that even with year-round growing, you have to time your planting correctly to give your garden the best chance to thrive.
Warm-season crops can be stunted and even destroyed by cold temperatures. Conversely, cool-season crops may bolt, or go to seed if temperatures are too warm.
I learned to research the crops that I wanted to grow to determine when to plant them outdoors.
If you buy seedlings, this information is usually printed on the plant tags. If you buy seeds, it is usually on the packets. For more on finding the info you need and starting your own seeds, you can check out the Seed Starting 101 Guide.
Speaking of seeds, starting from seed, or indirect sowing, allows you another opportunity to create a mini-climate suitable for short-term growing until the weather is suitable for planting outdoors.
I was very intimidated by the idea of starting my plants from seed, but I took on the challenge last year and had much success. I’ve started from seed again this year, learning even more lessons in a new environment. So many that we’ll save that for a future blog post.
4. Your garden really wants to grow.
The herbs and vegetables we love have one single mission: to complete their life cycle.
From seed, to sprout, to leaf, to flower, to fruit or seed.
You do not need a magical green thumb to help with this process. In some cases, the plants don’t really need you at all.
Some of your strongest plants can be “volunteers” that you didn’t even plant. A seed you accidentally dropped or one that dropped from a parent plant that went to seed.
So, do not think you have to have a magical green thumb to start a garden.
What we as home gardeners are really doing is experimenting with giving our plants what we consider good conditions to complete their life cycle.
I often get hung up on this. I’m a bit of a perfectionist and get stuck thinking that I have to create the perfect environment for my garden. When in reality, this just isn’t realistic.
Many, if not most, aspects of gardening are beyond our control. Especially growing a garden outdoors. Perfect weather can give way to sudden storms or temperature swings.
Beautiful seedlings can quickly succumb to pest pressure. This brings me to one of the hardest lessons that I had to learn.

5. Pests really want to eat your garden.
One day, I was sitting out on the patio admiring the squash leaves in my garden. They were deep green, and the size of both of my hands put together. I was so proud. Naturally, I pulled out my phone and snapped a pic for the gram.
As I continued admiring the plant, I noticed what I thought was a ladybug. By that time, I had learned that ladybugs are very beneficial creatures to have in the garden. So, I was really happy to see one. I noted at the time that this was a little different from the ladybugs that I was used to. It was orange, and the spots were perfectly symmetrical. Again, I had to get a pic.
It wasn’t until the next day or two that I realized that this was no beneficial ladybug. This was an imposter! Feasting on my squash leaves as I proudly shared pics of it on the gram.
My beautiful squash leaves were now riddled with holes. Entire chunks are missing thanks to the squash beetle. And it wasn’t just one. My plants were covered in them.
There began the battle. I researched solutions to fight off my new nemesis. I went out regularly with a bowl of soapy water. Thumping the little orange beetles in for a swim. I purchased a few organic powders and sprays to try to repel them. Nothing that I tried worked.
I finally had to accept that this was just another part of the gardening life cycle. You can fight pests with organic treatments, but in my experience, you cannot completely keep them away.
So, be proactive with your treatments, plant companion plants that the pest might be drawn to, plant a few extras of the crop that you want to harvest, and grow until the pest pressure becomes more than the plant can sustain.

6. Your garden doesn’t need water every time you get bored.
This one goes out to all the “COVID gardeners.” Those of us who started gardening when things shut down, and we weren’t going out much.
The perfect start of the day for me during the shutdown was to wake up, brew a cup of coffee, and go tend to the garden for an hour or so before logging in for work.
My 3 primary containers were self-watering raised beds. You just add water to the reservoir, and the soil soaks up water as needed. I later learned that this was a blessing in disguise.
My secondary containers were the little plastic pots. I kept all my herbs in them. After a few weeks, most of my herbs started to look stunned and sad. Limp and yellowish in color. I wondered what I could be doing wrong. They were getting plenty of sunlight, and I was watering daily.
After a bit of research, I discovered my error. Most of my herbs had Mediterranean origins. They didn’t need to be watered daily. It turns out, they actually prefer slightly dry soil.
It was then that I learned to check my soil with my finger to see if it was dry. Only when dry past my knuckle, did I add water.
I’ve since switched from plastic pots to grow bags. The fabric grow bags allow the soil to dry to a level that herbs like, and they also help with root development. I’ve seen a huge improvement in the health of my herbs since switching.
7. You don’t need as much space as you think.
I knew from the memories of my grandmother’s front yard garden that I didn’t need a full yard to garden. What I wasn’t quite sure of was how much I could grow on my 10 x 14ft patio. Turns out, the answer was quite a bit.
Using containers allowed me to position plants where I could easily access them. I created a pseudo row with the container-raised beds. Then I created another row with grow bags.
There are two things to be mindful of in tight spaces.
First, make sure your taller plants don’t shade out your shorter plants. My container-raised beds had wheels that allowed me to reposition them.
Second, make sure you leave yourself room to work. In small space gardening, pruning is very important. I had a little stool that I used to sit on while I tended to my plants. Being comfortable allowed me to spend hours upon hours in the garden without feeling strained.
8. You need more space than you think.
This was the biggest lesson that I learned.
When I started gardening, I had no idea what my seedlings would look like as mature plants. My first boxes contained squash, cucumber, tomato, peppers, and herbs all in one 20 x 24” planter. At the time of planting, everything looked fine. About 3 weeks later, I realized I had a problem.
The squash and cucumber leaves were approaching the size of my hand, and the plants needed support. The larger plants were also shading out the smaller plants. Not knowing what to do, I just let things go.
Once the squash and cucumber plants started to produce fruit, things went downhill, and quickly. The heavy feeders were putting a huge strain on the other plants. The crowding also allowed for diseases like powdery mildew to spread. I was able to harvest fruit for about a month, which I thought was great for my first time, but ultimately, I had to pull the bigger plants out.
To my surprise, once those plants were removed, the smaller plants took off. I was able to harvest many tomatoes and peppers over the summer and fall.
From there, I researched plant spacing and learned about the square-foot gardening method. I’m currently using that as a guide to plant my garden, and it is working well.

9. You can grow more varieties than what is available at your grocery store.
I live in a food desert. If you are not familiar with that phrase, it’s defined as an urban area in which it is difficult to buy affordable or good-quality fresh food. Our options are improving, but for several years, we only had one chain grocery store nearby. It had an unusually small produce section compared to its other chain stores. Naturally, the smaller the produce section, the fewer options available.
Growing food at home opened up those options for me. It allowed me to pick and choose which vegetables I wanted. It even allowed me to pick cultivars that work best for my growing environment.
If you’re growing in a small space, keep an eye out for container-friendly seeds and seedlings. Some examples are dwarf tomatoes, bush beans, and even pickle bush cucumbers.
That doesn’t mean that you can grow traditional vining varieties, but you will have to get very creative when it comes to supporting plants that climb and become heavy with vegetables. This can be as simple as adding some trellis support netting for your beans and peas, or melon cradles for your big squash. It could also be as in-depth as setting up a vine crop trellis system with roller hooks and vine support clips, as bigger farms use for growing tomatoes.
10. Failure is all part of the process.
This is another big lesson for me. One that I’m still struggling with, to be honest.
When a seedling dies on you, or your squash plant succumbs to squash vine borers, it’s hard not to take it personally. You’ve lovingly tended to your plant for days, weeks, or more. Only to see it fail before you get to enjoy a single harvest.
Just remember, it’s not personal. It’s nature. That vine borer doesn’t just see another plant, it sees a source of survival.
Embrace nature. Learn from the plants that survive, and from those that fail. Take plenty of notes and pics to learn from. Apply those lessons to the next round of plants and the next growing season.
Happy gardening and thanks for reading!
Written by Milan Turner @atlgrow