How to Successfully Start Dahlia Tubers Indoors: A Beginner's Guide

Get the Season Started by Growing Dahlias Indoors
Dahlias are one of America’s favorite specialty cut flowers, and flower farmers know it. According to the Royal Horticultural Society, there are over 57,000 registered dahlias, even though only 42 species exist. Dahlias are easy and fun to breed since they produce mixed seeds and replica tubers.
These popular annuals take a long time to mature and need temperatures to reach around 65°F (18°C) before planting, so starting tubers indoors offers growers a significant head start on the season. Imagine how much further ahead you’d be if you had dahlia plants to transplant when the weather aligns, rather than planting the tubers! Customers will remember you for being the first to market with fresh blooms, which they’ll remember next season.
Let’s discuss how to successfully start dahlia tubers indoors.

Preparing to Start Dahlia Tubers Indoors
Sprouting dahlia tubers indoors is a fun and effective way to enhance your skills, get a head start on the season, and head to market earlier with beautiful blooms.
Gathering Necessary Supplies
- Various-sized and shaped containers. Dahlia tubers vary significantly in size and shape, so it's best to have multiple options.
- Well-draining potting mix
- Perlite or vermiculite to help with drainage, optional
- Labels are crucial if you are breeding new cultivars.
- Healthy tubers
- Slow-release fertilizer
- Heat mats*
- Grow lights* or an Automated Vertical Propagation Rack
*Heat mats and grow lights are optional because some growers have a heated greenhouse that provides access to natural sunlight. Heat mats help “wake up” stored tubers.
Watch this video on how to set up your automated grow rack after delivery.

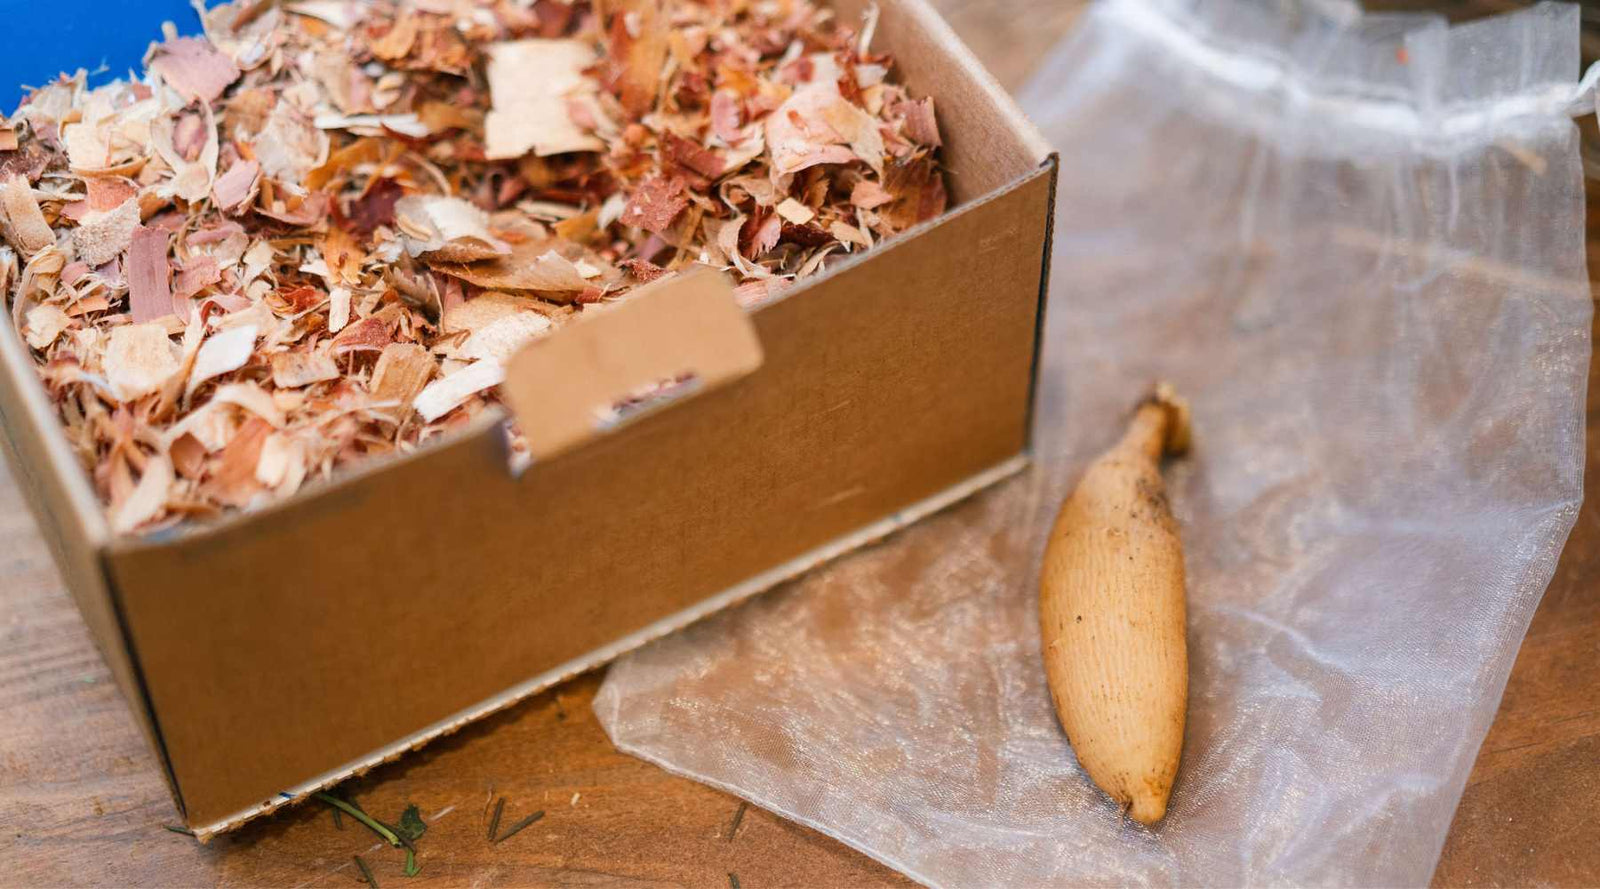
Selecting the Right Tubers to Plant from Your Winter Stores
Proper winter storage is crucial for keeping tubers healthy until springtime planting. A tuber stores water, carbohydrates, and nutrients for the next generation of plants, so its success is vital to a great dahlia season. Store them between 38°F and 55°F (3°C and 12°C) and at a relative humidity of around 80%, which helps prevent them from drying out.
Check on them throughout the storage months to ensure no mold or mildew forms. Then, look for the following characteristics to identify healthy tubers:
- Firmness, even if wrinkles are present
- No visible mold or rot
- Has at least one healthy eye and 1 cm of crown attached from the mother plant
- An intact neck provides energy and water flow to the new sprout that forms at the eye. The tuber is unviable without an intact neck.
- It has an earthy smell, nothing sour or rotty.
- The color is light tan with no discoloration or soft spots.
The sizes, shapes, lengths, and amount of wrinkles will depend on the variety. While you can briefly soak a very dry tuber to plump it back up, soaking is not generally advised.
For more information on storing and splitting your tubers in the spring or fall, read our article, "Easy Guide to Splitting Dahlia Tubers | Step-by-Step Tutorial."

Timing Considerations
If you’ve never sprouted dahlia tubers indoors, you’re probably used to watching the weather and checking soil temps for appropriate conditions to plant tubers straight into the garden soil. Planting dahlia tubers in cold, wet soil causes stress, which can inhibit their growth. Delayed growth means delayed blooms for you and your customers. Since some dahlia varieties take all summer to produce, you could be waiting for them to bloom as fall frosts are on the horizon.
This pre-sprouting method allows you to grow dahlia plants from tubers indoors, so you’ll have dahlia plants ready when the weather permits. The time commitment comes at the front end of the season, and the rewards are big.
Growers in most regions should plan to start their tubers in late March or early April, six to eight weeks before the last anticipated frost. This also allows time to make clones from cuttings as your tubers grow.
When getting started with cloning from cuttings, Bootstrap Farmer’s Propagation Kit has everything you need.
Related: When to Start Seeds Indoors on Your Homestead

Step-by-Step Guide: Potting Dahlia Tubers Indoors
Now that you know how to select healthy tubers and what materials you’ll need, let’s dive into how to plant and care for them once they’re potted up and growing.
Preparing Containers
Choose containers that fit the variety of sizes and shapes of your tubers, about 6 to 8 inches across and at the same depth. If you plan to grow your dahlias in pots all season on a patio, choose a material like terracotta or Grow Bags—7 Gallon Colored Fabric Pots that they can stay in. Choose clean, heavy-duty, and reusable plastic pots if you plan to transplant the dahlia plants into the ground when the weather allows.
Dahlias' success relies on the pot’s ability to drain properly, as tubers are susceptible to rot. Ensure the bottom of each pot has drainage holes, or the fabric is breathable and drainable. Drill additional holes if needed.
Choose soil that is loose, warm, and well-draining. Purchase an organic, high-quality, peat-free potting mix and combine it with well-aged manure. Or, select a soilless medium that’s a mix of bark, perlite, and vermiculite.
To prepare tubers, fill the containers about ⅓ full with moistened potting soil. Some growers add a biodegradable coffee filter at the bottom of the container to help contain soil and keep pests from entering.

Planting the Tubers
If you’re used to planting tubers outdoors, you’ll recall planting them horizontally. You can also do this indoors, ensuring the eye is as close to the center as possible. It’s okay if it’s not exactly in the center, but ensure there is ¼-½ inch between the non-eye and the edge of the container to provide enough space for the roots to form.
- If your tuber has already produced a sprout, place it with the sprout facing upwards.
- Your tubers should be about ⅓ of the way down in the pot.
- Cover them with more potting soil, leaving the stalk and eye uncovered.
- Leave the eye uncovered to monitor growth.
- Leave a few inches of headspace at the top, and add more soil after sprouting. This method keeps the tuber from becoming waterlogged while providing a safe environment for sprouting, without fear that the neck will snap or that roots will become exposed.
Or, use 3.3" pots or 5" Heavy Duty Seed Starting Pots and place the tubers vertically with the neck and eye exposed. This method saves space and allows you to watch sprouting and growth more closely.
Bootstrap tip: Use 1020 Extra Strength Trays with holes to sprout multiple tubers, saving space, energy, and soil. As they grow, transplant them to larger containers as needed.

Initial Watering and Care
The pre-moistened potting soil will provide water to the tuber during the initial growth stages. Water sparingly to avoid rot, especially in small tubers, which are especially vulnerable. Most experts advise avoiding watering until new green growth has emerged.
The American Dahlia Society says their “secret” ingredient is copolymer, hydrogel beads that absorb up to 150 times their weight in moisture, helping keep tubers moist. When mixed with water, they create a slurry of gelatinous matter. Mix this slurry into the bottom ⅓ of your potting mix, then place your tuber in the pot and layer more soil on top. Doing so will help keep your tuber moist in the initial growing stages and prevent new growers from underwatering. While this is not required, it is common among dahlia experts and enthusiasts.
To avoid overwatering, a common mistake, plan to water about an inch per week once growth has begun. If you correctly moisten your potting soil, the tubers won’t need much during their initial growth stages.
To prevent disease and pest pressure, adjust the environment to offer relative humidity between 40 and 60% and provide good air circulation. Indoor daytime temperatures should remain between 68°F and 72°F (20°C and 22°C), while nighttime temperatures should range from 60°F to 64°F (15°C to 17°C).
Related: How to Use a Humidity Dome for Seed Starting

Maintaining Growth Indoors
A comprehensive indoor grow setup is essential for proper growth.
Lighting and Growth Stimulation
Modern indoor grow lights are energy-efficient and highly effective, with LED options best suited for young plants and sprouting tubers. A sturdy rack with grow lights allows you to sprout many tubers at a time while not impeding too much on the rest of your early-season seed-starting tasks.
Add timers to lights to ensure your tubers receive 14 to 16 hours of sunlight daily, mimicking the six hours of natural daylight required. Position artificial lights about six inches above your containers or trays so new sprouts won’t have to bend their young stems to reach the light. Adjust the lights as the sprouts grow. If you rely on natural sunlight, rotate your plants regularly for equal transmission.
Related: Seed Starting 101

Monitoring Growth
Signs of healthy growth include:
- New growth in two to four weeks, but some can take up to eight weeks
- Loamy, loose soil
- No pest damage or visible pests on the soil surface
- Sturdy stems
Quickly multiply your stock in 4 steps:
- Pinch the center growth once the plant is around 5-6 inches tall to encourage side shoots and a fuller, bushier growth habit.
- Take a 3-inch cutting of green growth, then transfer it to a small pot with fresh soil and allow it to grow.
- Do this with each plant as often as possible, which may mean 5 to 7 cuttings per plant over the winter.
- You’ve created dahlia clones and multiplied this variety’s stock with little investment or effort!
Common indoor diseases include bacterial pathogens that affect the tubers in storage. Other dahlia diseases include Phytophthora blight, root rot, powdery mildew, and crown gall. For more information on controlling fungus in the garden, read the article "Fungus Control for Dahlias and the Garden" from the American Dahlia Society.
Potential pests:
- Aphids
- Thrips
- Broad mites
- Leafhoppers
- Slugs,
- Earwigs
- Japanese beetles
- Tarnished plant bugs
- Caterpillars
They aren't usually an issue until the plants grow outdoors. Scout for pests each time you water, feed, or reposition your pots. Light mulch, good drainage, sticky traps, and resistant varieties are among the ways to prevent common indoor growth challenges. Know your source when bringing dahlias and other plants onto your property.
Other indoor growing issues include insufficient warmth, overwatering, fluctuating temperatures or drafts, and selecting unviable tubers.

Transitioning Outdoors
Hardening off is crucial to transitioning any plant from indoors to outdoors. It allows plants to slowly acclimate from the safe indoor environment to the ever-changing outdoor conditions that fluctuate by the hour.
Dahlias will not survive a frost, so keep your eye on the local forecast and ensure the risk of frost has passed before starting this process. One week to ten days before you plan to plant your dahlias outdoors, begin the hardening-off process for a few hours at a time, gradually increasing the time each time. Start by placing them outdoors on a cloudy or partly cloudy day in a well-protected area. If they become stressed, move them back indoors and try the next day again. Eventually, they should spend an entire 24-hour cycle outdoors. Protect at night if necessary.
Dahlias thrive when temperatures are between 70°F and 80°F (21°C to 26°C) and when there are few fluctuations, similar to tomatoes. A well-draining area with full, south-facing sun is perfect for planting dahlias. Most regions can plant them out in mid to late May or June. Plant them about a foot deep or according to the variety’s recommendations. Space them 15 to 18 inches from center to center for best results. Dahlias will produce blooms in year one under the right circumstances.

FAQs About Potting Dahlia Tubers Indoors
What is the best way to store dahlia tubers before potting?
Store dahlias between 38°F and 55°F (3°C and 12°C), never frozen. A pest-free attic, basement, uninsulated root cellar, or closet works well. Humidity levels of 80% will keep them from drying out. Run a dehumidifier to prevent mold and decrease moisture if necessary. Wick away excess moisture while keeping the environment moist by layering vermiculite, peat, newspaper, or wood shavings.
How do I know if my dahlia tubers are too dry?
If you squeeze the tubers and there doesn’t seem to be any live flesh inside, or the exterior flesh is wrinkled and desiccated, they’re too dry. If you catch it early enough, they can bounce back. Bring a water mister bottle each time you check in on stored tubers. If any seem to be dry, give them a little spritz. Run a humidifier in the storage area to maintain humidity levels.
Can I pot dahlia tubers in plain garden soil?
If your garden soil contains clay, purchase bagged potting soil. When you water clayey soil, it turns into mud, which inhibits proper dahlia growth. You can also mix in coco coir to loosen clay soil and improve drainage.
What should I do if my dahlia tubers aren't sprouting?
- Check heat levels; the soil may be too cold.
- Ensure light levels are ample.
- Dig down into the soil and check for firmness and for any rotting.
- Consider water levels. Stick two fingers into the soil several inches. If sticky, wet soil is present when you pull them out, you may be overwatering. If your fingers are dry, it’s time to water.
- Be patient; some dahlia varieties take longer than others.
If you’ve confirmed all these factors are conducive to growth, the tubers may not be viable. If they are firm, consider bringing them to a warmer location and trying again in fresh soil.
Do dahlia tubers need special fertilizers when potted indoors?
Dahlias will thrive when fed a bloom-boosting fertilizer high in potassium and phosphorus. Avoid all-balanced fertilizers; look for an NPK of 5-10-10 or 10-20-20 instead. The key is low nitrogen. The tuber contains enough energy and nutrients to sprout, so anything supplemental should focus on blooms. Feed every few weeks once they’re in active growth, following the instructions and amounts on the packaging.
How much space do dahlia tubers need to grow indoors?
For best results, each tuber should have its own container based on size. However, you can sprout them closer together in 1020 Extra Strength Trays before transplanting them into something larger or the ground.
Written by Jenna Rich of Partners’ Gardens LLC.