Managing Overgrown Tomatoes
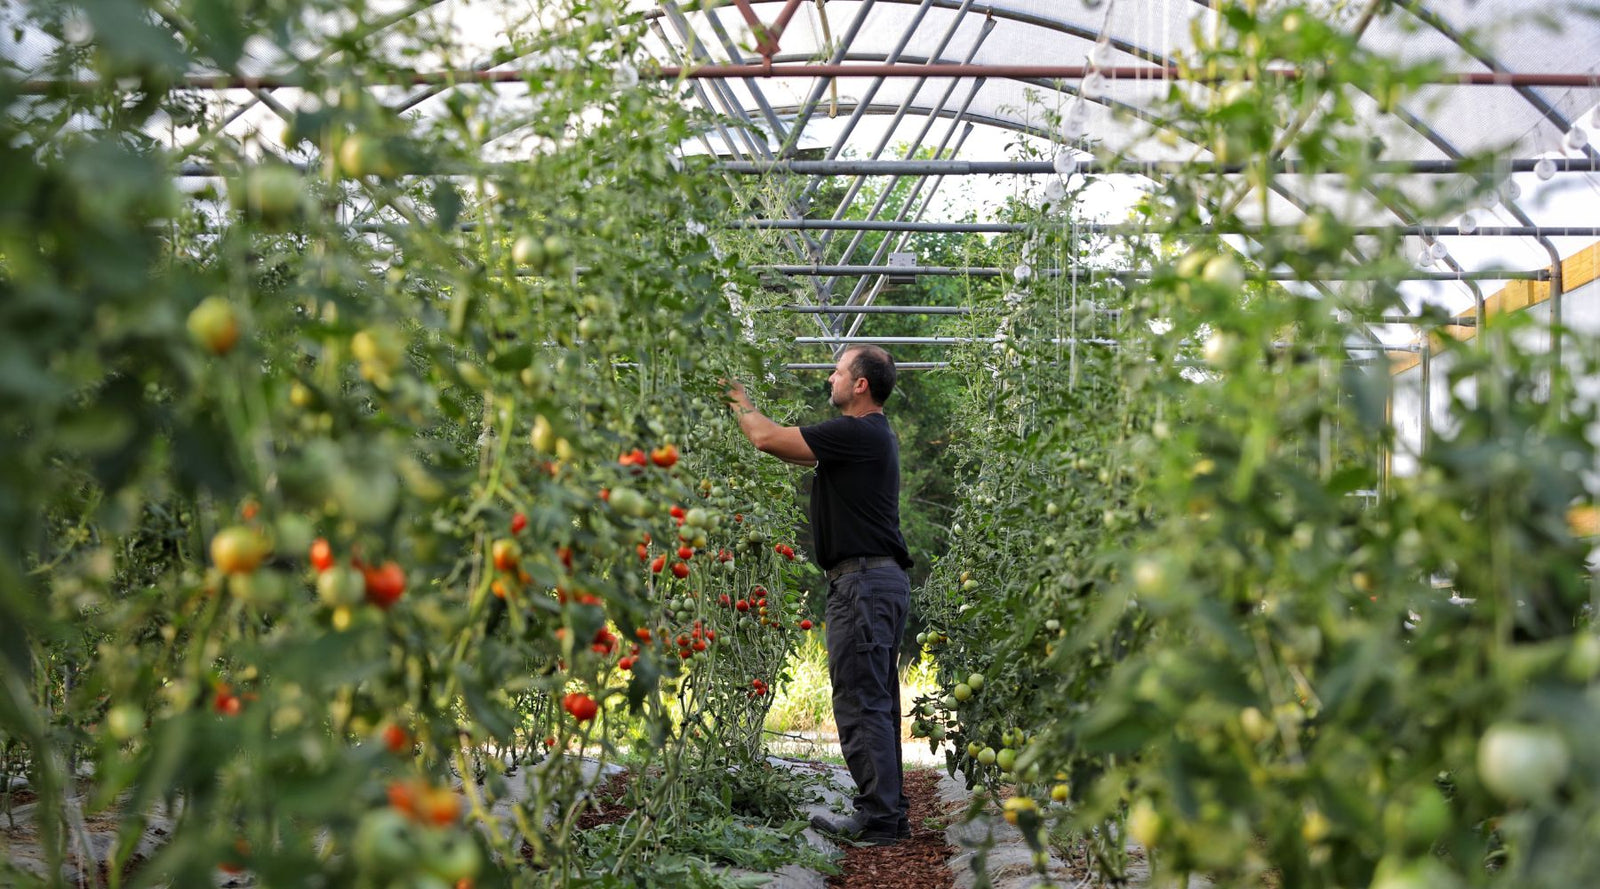

Nick recently had the opportunity to rehabilitate an overgrown hoop house. The vines were planted in March 2020 and not pruned and lowered until August 2020. This gave us a unique opportunity to review most of the scenarios you will encounter during a season of growing, pruning, and trellising, using the lower-and-lean method.
Solving problems as you go through your hoop house and knowing how to spot various issues early will make you a more productive grower. For an introduction, read our first article in the series, Pruning Indeterminate Tomatoes. We will review some basics here before we dive deep into the scenarios Nick encountered while pruning two 64’ rows of indeterminate tomatoes.
Review of the parts of an indeterminate tomato plant
Crown - The top section of the plant. This is the area where you will select one strong sucker to continue the plant's vertical growth.
Main stem/vine - This is the central stalk of the plant. Often referred to as the leader. A single leader plant is developed when the grower chooses one sucker to continue growing and removes all others.
Shoulder or axil - Any junction of leaf and stem.
Sucker - An immature branch that grows out between the main stem and a shoulder.
Leaf - Tomatoes have compound leaves made up of leaflets, which are distributed along the leaf rachis (central leaf stem).
Flower cluster - Also known as an inflorescence, these are composed of a central branch with multiple smaller branches terminating in individual flowers. The number and arrangement of flowers in a cluster are dependent on many factors, including variety and growing conditions.
Fruiting cluster - A flower cluster that has been fertilized and is developing into ripe fruits.

Reviewing the growing sections of a trellised tomato
As we go through the different solutions to problems you will encounter when working with trellised tomatoes, we will refer to four distinct sections of the plant. From top to bottom, they each have a different job and a distinct desired appearance.
- The crown and flowering part of the vine, where new growth is established.
- The fruit set and vegetative zone, where flowers become fruit clusters, and a canopy of leaves helps the plant transpire while shading developing fruit below.
- The ripening and harvest zone is where the fruit can be easily inspected and harvested at a comfortable working height for the farmer. The ideal space for the harvest zone is between the knees and the shoulder range of the person who will be doing the harvesting.
- The heavy-prune zone is a bare main stem cleaned of old clusters, suckers, and leaves. These pruned parts have served their purpose but are now taking nutrients and water away from the top part of the plant, which is still growing and producing fruit.
The basic rules of training and pruning a trellised tomato plant
Keep in mind that tomato vines are resilient plants. They can handle pretty rough treatment when they are properly supported by being clipped to a trellis line. Aim to clip your vines every few feet of growth. It is ideal to clip within a few inches of every fruit cluster. If this puts your clips close together, it is alright. More is better in this situation.
As long as you keep your leader vine well-supported and ensure the plant has enough leaves at the top to provide a canopy, your vines will continue to produce fruit. In fact, most F1 hybrid greenhouse tomato varieties will be more vigorous with some shaking. The movement strengthens the vine and encourages self-pollination. You will knock fruit off the vine. You will break the occasional branch. Give yourself permission to make mistakes as you go.

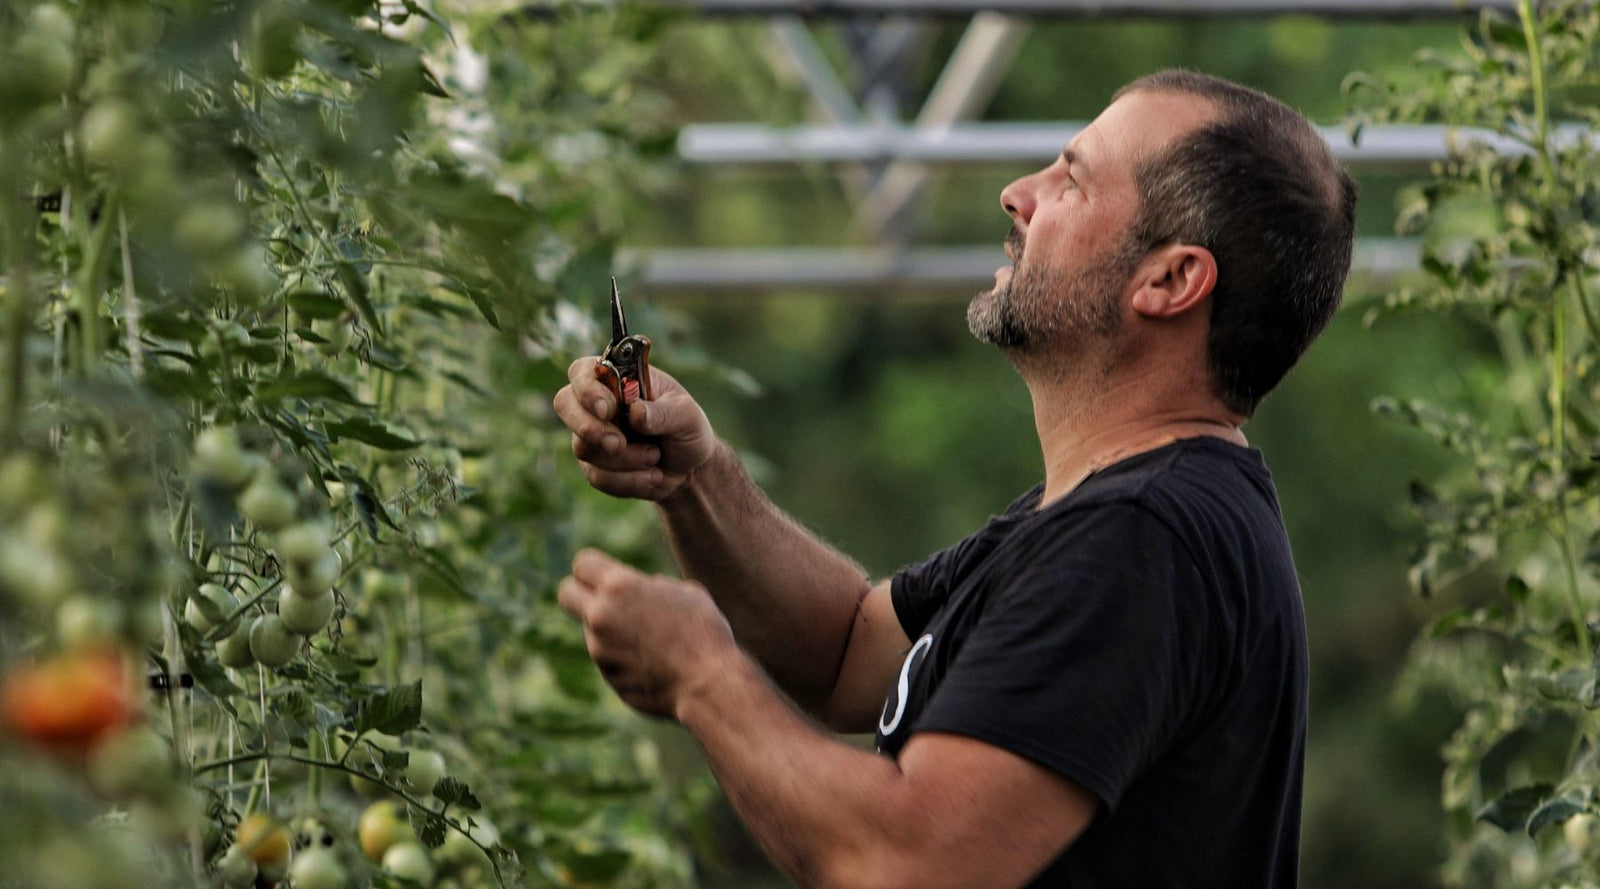
Everyone has their own pruning style
Nick is a pretty aggressive pruner. Some people will choose to be a bit more gentle in their pruning. You will develop your own method as you gain experience. You may find that experimenting with pruning some plants more heavily than others helps you to find your ideal. Each plant will decide what it wants you to do, and you will learn to listen.
Throughout this series, we have based our advice on single-leader indeterminate tomatoes. Some growers choose a double-leader system in their house, allowing each plant to develop two main stems. If you choose this style, lower and lean each plant's vines in the same direction. Instead of vines alternating individually towards the front or back of the house, you will have two traveling together around the racetrack.
In the end, it is up to you as the farmer to make choices. Each person will develop a slightly different style of vine maintenance.
Solving problems in the hoop house
How to untangle vines
Especially if you have gotten behind on pruning, there will be vines that tangle together or get hung up in the rafters and support structure of your hoop house. Start by pruning off everything below the next harvestable cluster. Do this for both vines if you have two tangled together before you try to lower them.
Unhook the roller assembly so you can pull the first vine down and walk it along the row. Find the strongest sucker or branch at the crown of the plant. Squeeze your roller assembly to let down enough line to reach around two feet above the crown of the plant. Clip just below the leading sucker. Rehook the vine to the support wire far enough along the row that the next harvestable cluster is about level with your knees.
Go back and clip along the vine for support, and remove any leaves from what is now the fruit harvest section. If any branches have developed in this section, remove them. The goal is to focus the plant's energy towards developing healthy clusters on the main vine.
Damaged vine repair
When you come across a place where the vine has split in the center, it is likely due to a lack of support. Apply a tomato clip to attach the vine directly below the split. If the split extends more than an inch or two, place a clip at the top of the split as well.
If the vine has bent and fallen over at the top, the main cell structure in the vine has been damaged. It is best to cut below the bend and treat this as you would a topped vine.
Saving a topped vine
There are a few issues that can cause a vine to be topped. It may be a bent stem from an unsupported crown or a slip of the clippers. Sometimes, in the process of untangling a vine, you will bend or break the leader.
Find the next strong sucker below the break. If the sucker is small, you can leave two and come back to make a decision after another week of growth. Mark the place that you need to come back to by putting two clips on the plant close together. This will remind you to come back to this spot the next time you are working the vine.
If there are no viable suckers beneath the break, double clip below the strongest leaf cluster and come back to the vine next week. Chances are that the plant will send out a few suckers from the axils below this point. You can return and select the strongest.
Removing dead or severely damaged plants
Removing dead or clearly diseased plants from the row will improve the overall health of your plants. The plant may have been stepped on or not receiving enough water. Cut the vine about an inch below the soil surface and remove it promptly from the house. Inspect the dead vine for signs of pest pressure, as it can signal developing problems.
Some people will want to replace these with a transplant. This is fine when the vines are quite small, but once they are over a foot or two in height, just leave the empty space. Having vines of dramatically different heights within a row is usually more trouble than it is worth. Particularly in a house that has become overgrown, you will be able to use the hole made by removing the vine entirely as space to lean and lower a nearby healthy vine.
Making holes to work in when pruning your tomatoes
Aggressively pruning the first few vines you work in the hoop house will help you make a nicely sized hole to work in. This is an area of the support cable that is free of other hooks and vines.
Once pruned, vines are at less risk of becoming tangled when you take the roller hook and move it further down the line. As you lower-and-lean vines, you will need this space to move the vines into. You can also use any holes made by removing problem vines to get this process started.
Remember to alternate directions as you move the vines. The first vine moves towards the back of the house, and the second leapfrogs past it to travel towards the front.

Qlipr Trellising System
Using a Qlipr Trellising System to lower-and-lean may take some time to get used to, as it differs from the traditional hook-and-line method. Once you get the hang of it, the system works seamlessly, reducing plant stress, saving time, and eliminating waste. The system consists of a metallic plant hook and two foam-lined stainless steel clamps. This reusable, plant-friendly alternative reduces labor and waste and eliminates the need for traditional string trellising. The plant hook hangs from a stretched wire at the top of the greenhouse, providing strong, adjustable support for plants.
Hooks are zinc-coated steel for a lifetime of use. Use it with our trellising system.
How to work past the row to turn the vine along the race track pattern
When you reach the end of the row, you will wrap the vine past and around existing stems to create the “racetrack” of stems that circles each row. This keeps the vines close to the plant's roots and out of your way.
When you reach the end of a row, extend the vine as far as you can out into your working room. This gives you the space and slack in the vine to turn around and continue back the other direction without bending the vine the next time you lean and lower.
When to prune flower clusters
As you go along the vine from bottom to top, take a look at each developing flower cluster. You may remember from the first part of this series that we recommend keeping between 4 and 7 fruits per cluster. When you come across a cluster with more than this, use your clippers to remove the smallest few from the end.
You may also notice clusters that have both flowers and developing fruit. Use your best judgment to take that cluster down to an ideal number of fruit that will be ready around the same time. For example, if you have nine branching points on the cluster and six of them are already developing fruit, remove the last three flowers from the tip.
When to cut and when to keep leaves on the vine
Different varieties of tomatoes can have very different growth patterns. For those with a thicker top canopy, you will remove nearly all the leaves in the fruit harvest zone. On plants with sparse leaf growth, it can be beneficial to leave the leaf directly opposite a developing fruit cluster.
Improving airflow to prevent pest and fungal issues
Bare stems below the fruit-harvest zone keep air flowing at the base of the plants. Removing the majority of leaves in the fruit-harvest zone allows air to continue flowing up around developing fruits. All of this airflow helps prevent fungal issues from developing.
Having harvested stems and low foliage near the ground can provide a ladder for pests to climb your vines and give them places to hide. When you remove these, it is also far easier to spot developing problems early. It allows you to manage any issues in a targeted way, saving on labor and treatment costs.

When to stop pruning
The longer you stare at a particular vine, the more you will find to cut. There comes a time when you need to say, “Good enough,” and move on. Allow yourself to get into a rhythm of pruning and learn how much time to spend in a particular place. You can always come back to that vine later.
Working efficiently to save labor hours and wear on your body
- Keep your equipment with you. If you drop a Qlipr trellis clip, don’t bother to bend over every time. You can collect all these at the end as you go through and pull out all of the pruned material.
- Aim to keep yourself and your fellow workers off ladders whenever possible. It is hard on the body, and the risk of injury is significantly higher.
- Pruning keeps the vines in a comfortable position for harvesting fruit and for continuing the lower-and-lean process.
- Invest in high-quality equipment. Galvanized trellis wire at the proper diameter will last you for years and save you the heartache of coming in and finding that all of your vines are on the ground.
- Clippers that fit your hand well are invaluable, like the Metallo Red Line Ergonomic Bypass Pruners.
Final thoughts on pruning tomatoes
Many of these scenarios seem the same, but they offer different options for what to do during the pruning process. Solutions repeat as many problems can have the same solution. Time and experience will teach you what the plant needs from you to produce the best tomatoes.
You may choose to work your vines top to bottom or bottom to top. You may have a different style of pruning from other people working on the farm. At the end of the day, what matters is:
- Good air flow at the bottom
- Consistent, easy-to-see fruit clusters in the harvest zone
- A healthy canopy of leaves and flowers in the top crown section
- Finding a happy medium between the needs of the vine and your optimal working conditions
Pruning tomatoes can be a meditative process. It’s honestly a great time to catch up on podcasts or ebooks you’ve been meaning to listen to. Follow these guides, and you will find your style and your rhythm as you grow.
Watch the Video:
Also in this series:
- Building Trellis for Indeterminate Tomatoes
- Pruning Indeterminate Tomatoes for Maximum Production in a Hoop House
- Using the Lower and Lean Method for Indeterminate Tomatoes in a Hoop House
Also in Growing Tomatoes


Growing Tomatoes for the Urban Farm
Maximize your urban farm's profitability with expert tomato growing strategies from Michael Bell of Dallas 1/2 Acre Farm. This guide covers essential tips for selecting high-yield tomato varieties, optimizing space, and ensuring a continuous, marketable crop.
Read More

Pruning Indeterminate Tomatoes for Maximum Production in a Hoop House
Here we will walk you through how to prune and trellis to get the most from your plants. With Nick from Bootstrap Farmer we start off this four part series by walking you through how to identify and prune the parts of indeterminate tomato plants.
Read More


Using the Lower and Lean Method for Indeterminate Tomatoes in a Hoop House
The lower and lean method of trellising indeterminate tomatoes in a hoop house has many advantages. Ease of working conditions and maximum fruit production are the key features of this style of tomato growing. When done properly pruning along with lowering and leaning will increase productivity and keep your plants healthier.