Propagate Herbs from Cuttings Easily at Home

How to Propagate Herbs from Cuttings: A Fast & Frugal Way to Multiply Your Garden
Herbs enhance meals, elevate your mocktail game, and serve as an effective pest deterrent in the garden. If you want more fresh herbs in your life, propagating is a quick and efficient way to do so.
Propagating is simply snipping a branch from a healthy plant and rooting it in soil or water to start a brand new plant. While herbs are relatively easy to start from seed, taking cuttings from existing plants takes a fraction of the time. Starting plants from seed takes 6-8 weeks, whereas propagating herbs from cuttings takes 2-3 weeks.
This gardening method:
-
Saves money
-
Produce a steady supply of your favorite herbs
-
Allows growers to scale up herb production with just a few plants
Propagating herbs from cuttings is an easy and cost-effective way to expand your herb plot. It also ensures a steady supply of your favorite herbs. This article will discuss how to propagate herbs from cuttings, the best herbs to propagate, and the two best methods of propagating herbs. We’ll share resources and show you how to set up a successful workstation.

Why Propagate Herbs from Cuttings?
Fast Growth, Low Cost
Herb propagation is ideal for beginner gardeners or those who want to see quick results for their time and energy. With a few basic seed-starting supplies and potting soil, you can grow free plants fast.
If you love the slower process of starting plants from seeds, that’s always an option. But if you want to see quicker results and experience the satisfaction of creating new plants from your healthy ones, propagating is the way to go.
Plus, herb cuttings are the perfect gift for friends, family, and neighbors. The gift of a baby herb plant that you started is thoughtful, personal, and free!

When to Take Cuttings
Take cuttings when the parent plant is lush and healthy, with new growth. Avoid plants that are dormant and stems that are flowering.
Soft cuttings root quickly. Take these in spring and early to late summer. Plants will have green stems that easily bend. Examples of soft cutting herbs:
-
Basil
-
Chives
-
Lemon balm
-
Mint
-
Dill
Take semi-ripe or slightly woody cuttings late summer into early fall. We call it slightly woody because the best stems for cuttings are firm and woody at the base, while the tip is green and soft. Examples of semi-ripe herbs:
-
Sage
-
Lavender
-
Rosemary
-
Bay leaf
-
Thyme
Take all cuttings in the morning, before peak sun, so they don’t wilt upon harvest. Allow some time for morning dew to burn off. Get them into shade as soon as possible if you’re cutting on a hot day.
Make sure your cuttings will have enough time to mature this growing season if you plant them outdoors. Otherwise, make an area of your home or greenhouse to protect them through the winter. Then you’ll have a jumpstart on your plot next season!

Which Herbs Root Easily from Cuttings?
Beginner-Friendly Herbs
These are among the best herbs to propagate:
-
Basil: Who doesn’t wish there were always more basil? It’s one of the most prolific, delicious, and easiest to split.
-
Mint: Mint will take over the area you plant it in, so it makes sense that it’s an easy one to take cuttings from. There’s basically an endless amount of stems to snip.
-
Oregano is a hardy, woody perennial plant that’s easy to root and expand.
-
Thyme is easy to divide because of its extensive root system.
-
Lemon balm is part of the mint family, so it behaves the same as common peppermint; wild! It spreads quickly underground via rhizomes.
Learn more about growing and caring for seedlings in How to Grow Seedlings.
Herbs That Are More Challenging (and Why)
-
Rosemary is a dessert plant, so it’s a bit trickier to propagate. It flowers in late winter, so the best time to take softwood cuttings is after new growth occurs, in early to late summer. This will yield the best results.
-
Lavender also originates from the Mediterranean region. Take semi-soft cuttings in the summer. The key to success is the proper potting mix (gritty) and drainage (high). This will prevent rot and increase the chances of rooting.
-
Parsley, while you can propagate cuttings, is much better when started from seed. The seeds prefer cooler temperatures (50°F-80°F (10°C-26°C)) during germination. Cooler temperature requirements are ideal for beginners who don’t yet have a heat mat.
Quick WinDon’t waste time on tricky herbs — start with fast-rooting varieties like basil and mint for best results.
Water vs. Soil Propagation: What Works Best for Herbs?
Pros and Cons of Each Method
Water: This method is easier to monitor, but the roots tend to be weaker. You may prefer this if you are rooting herbs with children as an experiment, as it’s easier to watch the roots form in water.
Soil: This method requires high-quality trays or pots and potting soil. The results are more consistent, leading to stronger roots and greater long-term success. Select clear pots for the best visual experience of rooting.
Homesteaders and beginner gardeners will have great success using the soil method. Grab some high-quality soil and Bootstrap Farmer seed-starting products, such as humidity domes and heat mats, and you’ll be set.

Step-by-Step: How to Propagate Herbs from Cuttings
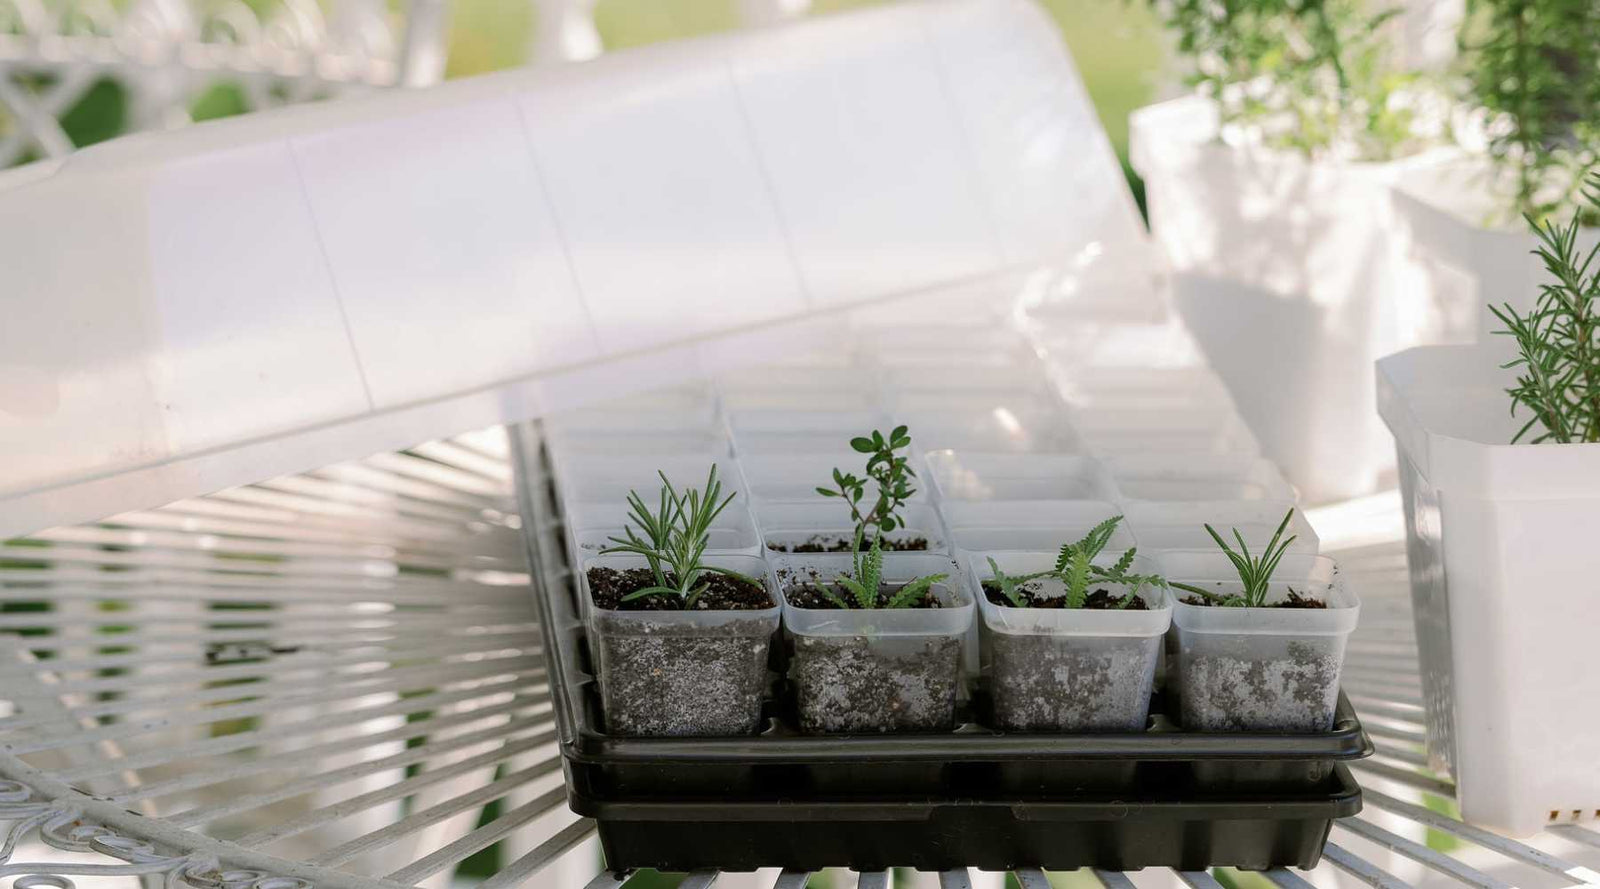
1. Prepare Your Propagation Setup
Must-have supplies:
-
Clear 6-cell inserts. You may also opt for a propagation kit.
-
Potting mix that aligns with the herb you’re working with
-
Well-draining mix high in organic matter for herbs like basil
-
Gritty mix for Mediterranean herbs. Can use a succulent mix, or add coco coir, sand, or perlite to your mix.
-
Humidity domes. Our domes feature an adjustable vent.
-
Plant labels to stay organized
Professional-grade gear reduces failure, especially for beginners. Use products designed for the task at hand to increase success and build your confidence as a grower.
Prepare a clean area with ample space to work. Arrange all your supplies before getting started. An organized, tidy workspace makes work more efficient and enjoyable.

2. Choose and Take Your Cuttings
Select the healthiest plants from your plot. Avoid flowering branches. Ensure they are pest and disease-free, with plenty of strong branches to choose from. Then follow these instructions:
-
Snip below a leaf node. Your cutting should be 4-6 inches long.
-
Strip off the lower leaves.
-
Place each cutting into soil. Gently tamp down around the stem to ensure good soil contact. If you add your cuttings to water alone:
-
Refresh the water daily
-
Keep the glass in a warm, sunny spot
-
Monitor for root development.
-
Transfer your rooted cuttings to 4-cell inserts to continue growing.
-
Place the cuttings in a 1020 tray and gently spray them with water.
-
Add a dome to the 1020 to trap the humidity.
-
Set the tray onto a heating mat and set it to 70°F-75°F (21°C-24°C).

3. Rooting and Monitoring
Keep the humidity dome on. Lift it once a day or adjust the vent to ensure good airflow. Use a light mister to keep the enclosed area humid, but keep your eyes peeled for any signs of mildew. If you see any green growth on the soil surface, the humidity is too high, and the space needs more airflow. Take a quick sniff when you remove the dome, too. Mildew can cause a musty, damp-basement odor.
Monitor also for dry soil. If you notice the soil is bone dry each day when you lift the humidity dome, water from the bottom more frequently. Keep the soil consistently damp to prevent stress and increase the chances of survival.
4. Know When They're Ready
After 2-3 weeks of caring for your young cuttings, gently tug on the base of the stem. If you’re met with resistance, it’s working! Tiny white roots are emerging from the stem. As they continue to develop, they’ll reach into the soil to search for water and nutrients.
Note that if you allow your cuttings to root in water, you’ll witness the root development before adding them to soil. Our propagation kit includes clear 2.5-inch pots that let you see the magic happening beneath the soil surface if you go the soil route.

Troubleshooting Herb Cuttings That Won’t Root
Common issues
Possible causes and fixes
Too dry
-
Water more frequently
-
Swap your potting mix
Too wet
-
Water less frequently
-
Ensure trays have proper drainage
-
Adjust heat mat settings
Too cold
-
Adjust heat mat settings
-
Move your cuttings to a warmer space
Poor cutting quality
-
Select a healthier parent plant
-
Select healthier stems from the parent plant
-
Try again with rooting hormone powder or coconut water
Wilting
-
Ensure there are no drafts nearby
-
Increase humidity
-
Be sure no leaves are under water or soil
-
Fungal disease
Rot
-
Water less frequently
-
Ensure good drainage
-
Decrease the cell or pot size
Failure to root
-
Ensure the soil is tamped down for good soil to stem contact
-
Adjust temperature
-
Adjust watering amount and schedule
-
Be sure you take cuttings from a healthy parent plant
-
Try using rooting hormone*
*Note that not all rooting hormones are organic. Keep this in mind if it’s important to you or required by organic certification. Our guide on How to Propagate Roses from Cuttings had a number of organic alternatives to rooting hormone.

Scaling Up and Sharing the Bounty
Expand Your Herb Bed Quickly
Once your cuttings are mature enough to plant, quickly fill new or empty garden spaces. This method also works well after quick-maturing crops like radishes are harvested. It’s easy to plant fresh herb seedlings after vegetable harvests.
As you gain experience with each herb, determine which varieties perform best in your space. Most importantly, you can decide which herbs to expand plots of based on your preferences, as well! This will ensure you won’t run out of your favorites in future seasons.
To get your soil into top shape, read our Beginner’s Guide to Soil Amendments.
Share or Sell
If you find yourself with loads of leftover cuttings and you already have what you need, here are some ideas on what to do with the extras:
-
Pot them up and bring them to new neighbors
-
Use them as host gifts
-
Donate them to a local community garden or workshop
-
Gift them
-
Sell them online or at your local farmers’ market
FAQs For Easy Herb Propagation
Which herbs grow best from cuttings?
Basil, mint, oregano, parsley, lavender, rosemary, and thyme are the easiest herbs to take cuttings of.
Do I need rooting hormone for herbs?
It’s not necessary, but it’s a tool to keep on hand if you’re having trouble rooting semi-woody herbs.
How do I know when my cutting has rooted?
Gently tug at the base of the cutting after 2-3 weeks in soil. The cutting has begun sprouting roots if you feel resistance.
Can I use grow lights for propagation?
Yes, you can use grow lights. Provide cuttings with bright, indirect light for best results.
What’s the best potting mix for rooting herb cuttings?
The best potting mix depends on the type of herb you’re propagating. Soft annuals like dill, basil, and cilantro require well-draining soil high in organic matter. Woody or semi-woody herbs like lavender and rosemary need a drier, coarser mix to survive.
How long does it take for cuttings to root?
It will take 2-3 weeks for cuttings to set roots under ideal conditions.
What’s better: water or soil propagation?
Herb cuttings put in soil typically form stronger, more robust root systems.
Can I take cuttings from store-bought herbs?
Cuttings from grocery-store herbs may succeed, but fresh herb cuttings are more likely to take. Plus, you know how they’re grown and can guarantee the variety.
-