
Avoid These Common Pitfalls When Assembling Tunnel Kits
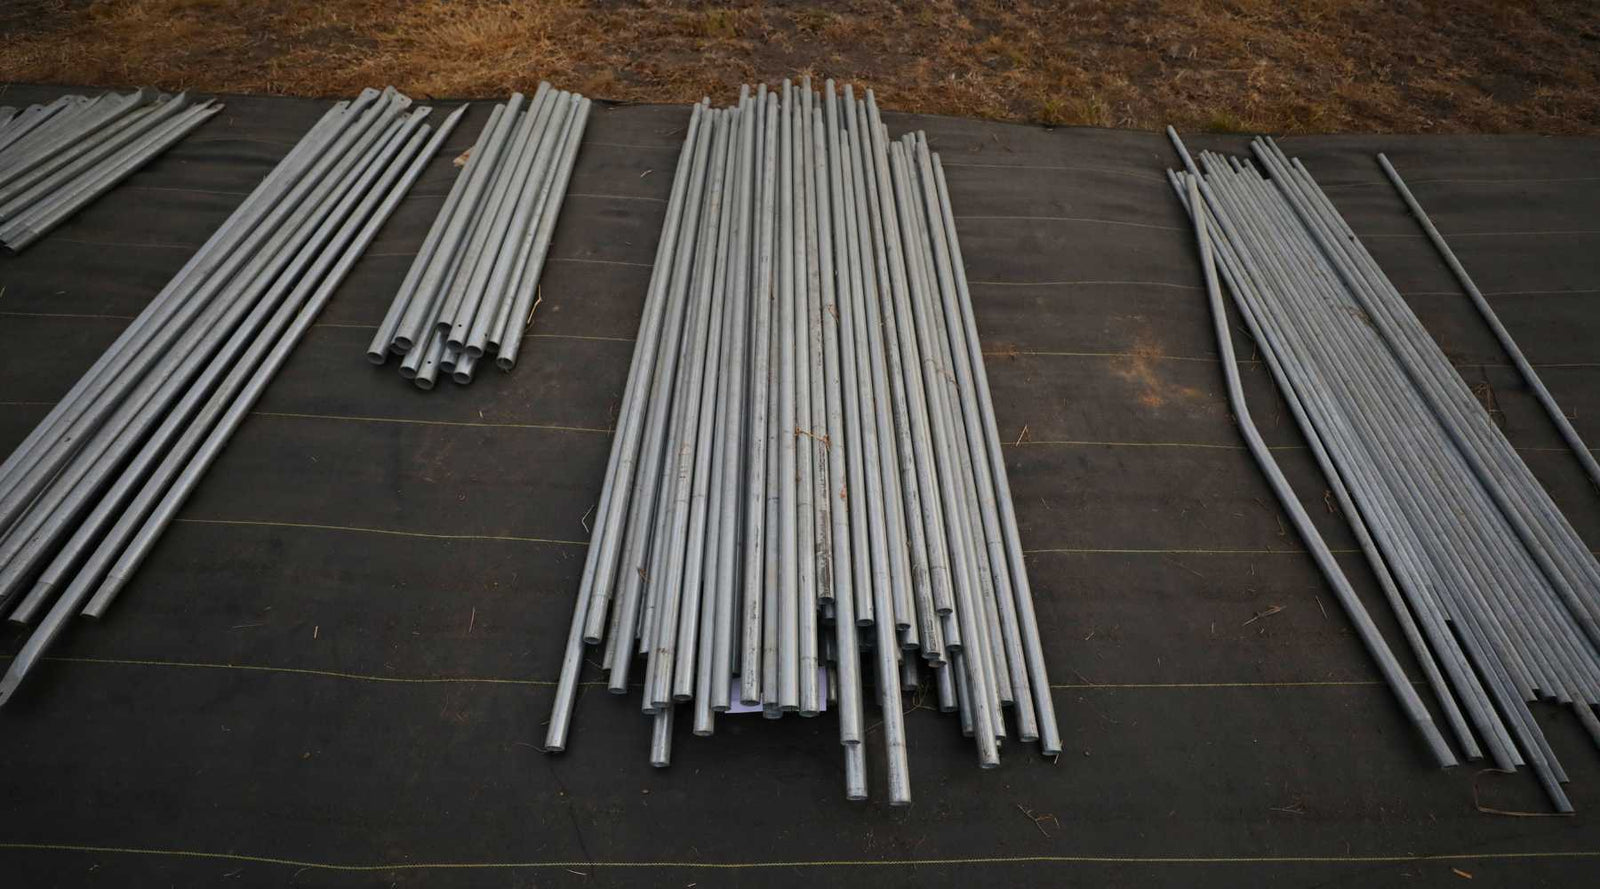

High tunnel kits make building a new structure on your farm convenient, straightforward, and affordable. Bootstrap Farmer all-metal kits include everything you need to assemble a safe, long-lasting high tunnel. You’ll even get comprehensive instructions, because we know proper assembly saves you money, time, and resources in the long run. You supply the perfect plot, simple tools, and helping hands, and we’ll take care of the rest.
Common Greenhouse Mistakes
There are common mistakes, of course, so we put together a list of common pitfalls. Keep reading to avoid these common pitfalls when assembling tunnel kits.

1. Preparation Mistakes
Not Conducting a Complete Inventory
Unbox your kit upon arrival. Confirm that all pieces, parts, and instructions are included. If something is missing, reach out to get what you need. You don’t want to be in the middle of your build and then realize you’re missing parts. Checking inventory prevents frustration and avoidable delays. Check out this video of an greenhouse kit unboxing here.
Overestimating Time and Underestimating Complexity
Once you’ve confirmed all parts have arrived, read the instructions from start to finish. Develop a realistic timeframe based on:
-
The size and complexity of the build
-
Your experience
-
The experience of your helpers
Have a structured plan so you can break down the project into multiple days. Each task will seem more manageable when the build is laid out concisely. This method prevents frustration.
Poor Crew Utilization
Always identify suitable helpers and tasks before your build day arrives. Helpers don’t need prior tunnel-building experience, but they should have basic tool knowledge. Everyone should know how to stay safe on the job site. Idle people make for frustrating, inefficient workflows, so make sure everyone has a clear purpose.
Assign tasks before the build day arrives based on age, limitations, and knowledge. Your carpenter friend can help with foundational work and may not need much guidance. Less experienced helpers may need more hand-holding. Be prepared to lead.
Front-load these tasks to prepare for the next steps and avoid people standing around idly:
- Pre-drill holes
- Lay out parts where they’re needed
- Take measurements
- Make jigs for quick measuring and cutting
- Have kids or teens helping out? Ask them to unpack and organize nuts, bolts, and other various parts. Just be sure any young kiddos aren’t handling parts that may be choking hazards.
- Clean up as you work to keep the build moving

2. Site Selection and Layout Issues
Uneven or Unstable Foundations
The last thing you want is a structure weakened by an uneven or unstable foundation. All your hard work and money could collapse over time. Simple tools like levels and ground stakes ensure the ground is even, so your foundation is stable.
Bootstrap Tip
Check the grade periodically, because a level that’s a little off can grow as you build.
Choosing the Wrong Installation Location
Tunnel location will make or break your crop production. You want a sunny area without water pooling or high winds. Track the sun for a few months, test the soil, and choose a flat spot. Make sure you can fit a tractor inside if needed, and that water access is nearby.
Our article, Ideal Greenhouse or DIY Hoop House: Orientation and Location, delves into key considerations and tips for choosing the ideal location.
Overlooking Environmental Factors
Tunnels are an investment, but don’t skimp on features you need for success in your climate. High wind gusts and heavy snow loads impact structural stability and long-term performance.
Northern growers should consider a peaked structure like our Gothic All-Metal Hoop House Kit:
- High arch prevents snow build-up
- Tall ceilings allow for tall indeterminate crops
- 14' and 20’ wide kit includes purlin kits & corner bracing

3. Assembly Errors
Incorrect Frame Assembly
Read instructions thoroughly and follow them without skipping steps. Seemingly small, unimportant steps could cause instability or misalignment in the future. Always double-check that connections are tight with a wrench. This ensures safety and stability.
Improper Ground Post Installation
When ground posts aren’t deep enough or are not consistent with others, your tunnel may lean or sag over time. Uneven ground could result in:
- Inconsistent rain and snow shed
- Instability
- Poor performance
Bootstrap Tip
Use the ground post driver to avoid damage to the posts, which is included in our kits.
Learn all about Ground Posts and Hoops here. Then watch this VIDEO: Ground Posts: The Most Important Part of Your Hoop House, which provides tips on installing ground posts properly and why they're important.
Incorrect Film Installation
Improper tension during greenhouse plastic installation can cause sagging, wrinkling, and tearing. Work patiently with your team to keep the greenhouse plastic taut. Pull evenly as you secure spring wires in the lock channels for a clean finish.

4. Ignoring Weather and Safety Precautions
Assembling in Poor Weather Conditions
Avoid poor weather conditions at all costs. Wet surfaces increase the risk of personal injury. Cold temperatures can lead to improper installation. Check the forecast and plan to build your tunnel on a calm, dry day with mild temperatures.
Lack of Anchoring During High Winds
Before impending storms, batten down the hatches to prevent damage:
-
Close doors
-
Tighten any loose fasteners, ropes, and straps
-
Secure anything loose with extra sandbags or spring wire
-
Consider adding corner brace kits to prevent plastic from catching in the wind
-
Add wind bracing and purlins to strengthen structures
-
Temporarily add reinforcements to the endwalls
No Backup Plan for Weather Delays
Strong winds, harsh rain, and snow can bring your build to a complete standstill. Unfavorable weather can also ruin expensive sitework. Check the weather forecast every day and plan to build during a few days of ideal weather. Plan accordingly for a much smoother build.
Develop a backup plan. Especially if you’re building in the early or late season, when the weather is more unpredictable. Don’t expect too much out of one weekend, and plan for some delays. This is normal. Be as prepared as you can be, but understand that some portion of the build may need to be pushed off due to inclement weather. Better safe than sorry.

5. Post-Assembly Maintenance Neglect
Skipping Regular Checks
Make bi-annual or annual maintenance checks a regular farm task. Check for loose bolts, wear and tear, loose connections, and plastic integrity on weekly or monthly farm walks. Keep repair tape on hand to patch any small holes before they get big.
Here’s your annual high tunnel maintenance checklist:
- Secure plastic and hardware
- Test end wall strength
- Reinforce tunnel bracing
- Tighten batten tape and roll-up sides as needed
- Oil hinges and other moving parts
- Disconnect and flush water lines
- Store valves, filters, and electronics indoors
- Inspect baseboards and other primary connections
- Clean up drainage zones
Not Repairing Damage Promptly
Small tears in plastic and landscape fabric can quickly grow into big ones. Fix them while they’re minor and manageable. Neglect leads to poor performance, pest and critter issues, and improper drainage. One swift gust of wind can rip greenhouse plastic right off if it’s not in good working order.
Check out our guide, Quick Tips for Repairing Greenhouse Plastic Like a Pro. It provides an easy step-by-step guide for fixing plastic and troubleshooting common issues to avoid.
FAQs For Common Pitfalls When Assembling Tunnel Kits
Why is it important to inspect ground conditions before assembling a greenhouse tunnel kit?
Simply looking around in the area you’re considering for your tunnel will determine:
- Drainability
- Sun exposure
- Fertility
- Levelness
- Impeding structures
Proper location and orientation are key to crop success.
What are the most common issues when installing greenhouse film, and how can they be avoided?
Install greenhouse plastic when the weather is mild and the air is calm. Extreme temperatures and strong winds will damage your plastic and may cause long-term issues.
How do I determine the best location for my greenhouse to ensure proper drainage and wind protection?
Avoid sloped areas and those where water commonly pools. If there is a sunny location behind a windbreak, that’s a huge bonus.
What tools are essential for assembling a tunnel kit, and which are commonly overlooked?
Tool must-haves:
- Drills
- Ladders
- Wrenches
- Various-sized levels
- Wrenches
- Metal Saw
Tools that will make your build easier are:
- String line
- Line level
- Plumb bob
- Utility knives and markers to mark measurements
- Pneumatic post pounder
- Extra batteries and bits!
How can I protect my greenhouse when severe weather is predicted?
Protect your greenhouse before severe weather strikes by:
- Tying up loose ends
- Closing doors
- Rolling down sides
- Securing loose fasteners
- Adding extra spring wire if needed
- Repairing plastic tears
- Using additional sandbags